Tuesday, November 27, 2012

A Choux Pastry that Floats


Elegant little swans
Since I was a kid I remember enjoying the delicate and light choux pastry. It came in different shapes and different flavors, the house favorite were always éclairs and choux.

Choux is a small cabbage-shaped pastry filled with pastry cream dusted on top with icing sugar. I just loved how the sugar would fly of the pastry as your edges ever so closely to this delicacy and you open your mouth to take a bite or just to throw the whole piece inside!  These are sweet moments that you always cherish!

I don´t remember exactly when I first saw the swan shaped choux pastry, but I remembered that I just loved the idea, perfect shape for a perfect taste.

Choux pastry is a true classic, it has withstood the test of time due its versatility, its lightness and delicate crisp exterior. It was already in use some five centuries ago. It´s not exactly known who invented this recipe. Some speculate that the relatively simple ingredients and preparation process this recipe requires makes it possible that it was developed in various places separately. 

Legend says that when Catherine de Medicis moved to France, she was accompanied with her a chef called Pantanelli, and that he was the creator of this delicacy in 1540. But many recipes were found under the same name but had different ingredients and made in different ways. On the other hand similar recipes were found but under different names like benets (in English cook books dating back to 1584), french fritters or beignets soufflés. Also similar recipes were found in German cook books dating back to 1553!

Anyhow, it doesn´t matter where, who or when this recipes was created, what really matters that now we can enjoy it in different shapes, different flavors and at any time. Just few easy steps and we have such a versatile pastry that can be filled with sweet and savory fillings.

Here in Spain, this dough is used to make  buñeoles del viento, specially made on the 1st of November which are ball shaped and deep fried pastries filled with many different types of creams, chocolate and  praliné among others.

So let's see how you can make at home this pastry and get creative with the shapes you want to make.

For the choux dough you need:
  • 125 cl water or 125 cl  milk, or a mix of both 
  • 3 g salt
  • 3 g sugar
  • 75 g flour
  • 100 g butter, cut into small cubes
  • 2 eggs (125 g )
  • Lemon zest or few drops of vanilla essence
The dough is not complicated but requires a certain know-how
How to:
In a heavy bottom pan, combine milk, water, salt, sugar, butter and lemon zest or vanilla. Put on the flame and when the mixture is boiling add the flour in one batch and stir quickly. With a wooden spoon cut through the dough, this way it will dry perfectly, you need to mix and cut the dough for about 4 minutes. 
When the mixture doesn´t stick to the walls of your pan, and makes a ball, transfer it to a bowl and leave it to cool for 3 min. Now Start adding the eggs one by one, make sure that each egg is well combined before you add the next. The dough is ready when it falls slowly forming a ribbon.


Thick but fluid dough that forms ribbons

If you decide to make the swans, start by piping the heads, make some extra ones if any breaks, and bake them in a preheated oven (200 C) for about 5 min, as they are thin they will be done quickly.
It is a flexible dough, so be creative

Meanwhile pipe the body of the swans in large balls that taper and become pointy at one end. You need to bake those for about 20 to 30 min depending on your over and how big the choux  balls are. Usually when the choux is of a nice golden brown color it means they are done. Don't be tempted to open the oven before they have this nice color because the choux will flatten and no longer puff. 
The main body of the swans
While the swans are cooling, you can prepare the filling, I went for an easy one, whipped cream with cream cheese and maple syrup, for it you need:
  • 250 ml cream (35%)
  • 2 tbsp cream cheese
  • 1 or 2 tbsp of maple syrup (to taste)
  • 20 g of sugar 
Beat the cream with the sugar until thick and fluffy, Beat the cream cheese in another ball with the maple syrup than fold it in with the cream. Before beating my cream, I put the bowl and the whisks in the freezer, this helps the cream to thicken quickly and hold its shape.

Now you can assemble your swans!

Cut the ball that will form the main body of the swan. Make the upper layer smaller than the bottom one. Now slit the upper layer in two, these parts will form the wings of the swan which will be positioned on top. 

Fill the bottom layer with cream, put the top layer on top making sure you fan the two parts a bit to make them resemble wings in a resting position.  
Swan assembly line

You can vary the shape and size of your swans to your liking
When you have them ready, you can dust some icing sugar on the top.

Following some few steps and knowing some few tricks you will get and very tasty and light dessert, that can be served in many ways, floating swans is one of them. Bon appetit!

 Swans made from choux pastry, a floating delicacy

Tuesday, November 20, 2012

Pumpkin Pie and Happy Thanksgiving!


The earthy tones of pumpkin pie reminds us of the fall season

The world is acquainted with American traditions and celebrations thanks to the strong influence of American movies, TV series and music have on the world's pop culture.

While growing up I was, and still am, a fan of American movies. Many of these movies showcased a celebration which is totally alien to us, but its accompanying traditions seemed pretty similar to how we celebrate Christmas. The celebration in question i.e. Thanksgiving  is American and putting aside the true meaning of this celebration, I always enjoyed the scenes where families gathered to enjoy a delicious meal of a perfectly roasted turkey and all its side dishes as well as the traditional pumpkin pie.

The idea of pumpkin pie  always intrigued me. Back home we  use  pumpkin in many savory dishes but not in desserts, although a delicious jam is made from it. Additionally, pumpkin pie is not a traditional dish in  in Spain and I didn't sample pumpkin pie in Madrid till last year when I went to a well know American restaurant in the Spanish capital. Needless to say, I really enjoyed the pie!

The origins or precursors of pumpkin pie are a few centuries old. Pumpkins were among the many new food items brought from the New world  to the old world. The Europeans specially embraced the use of pumpkins as they were similar to squash and courgettes but more interesting.

The first recipes known date back to the 16th century, and they were known under the name of pompion a name probably derived from the Greek pepon which means large melon. Pompon was the french name given to the recipe, and the English called it pompion, which may implicate that the origin of the recipe is french.

According to some historians, the first pumpkin pie recipe published in Amercia was in 1796, in Amelia Simmons´American cookery, that recipe is the most similar to the pies known nowadays, and was called pompkin pudding!

We are half way through fall, and pumpkins are available now among other fall fruits and vegetables and as I have so many things to be thankful for, I decided to have my own Thanksgiving and the star of my own celebration will be a delicious Pumpkin pie.

It is the first time that I bake this pie and of course I wanted it to be special. I have to say I did experiment on this one, and a lot, but hey that's the fun of baking and cooking!

Easy to make pie crust

For my take on  the traditional pumpkin pie you need for 2 small pie shells or tarts: (10 cm tart tin)
Crust:

  • 100 g flour
  • 20 g freshly roasted walnut
  • 15 g sugar (you can use more but if you do so use powdered sugar for the rest of the desired amount)
  • A pinch of salt
  • A pinch of freshly ground star anise
  • 50 g cold butter, cut into small cubes
  • Ice cold water
In a food processor, combine flour, sugar, walnuts, salt and star anise, pulse until the ingredients are well combined and the walnuts turned to powder. Add the butter and pulse for few seconds, until you have a sandy mixture. Put in a bowl and gradually add few drops of water until the dough stops sticking and can be formed into a ball. Wrap it in plastic and put it in the fridge, you can do that a day ahead.

On a floured surface, roll the dough to about a half  cm thick, transfer it to the pie tin, and put it in the fridge for 30 min. Now cover the dough with baking sheet and any kinds of grains and blind bake it for about 10 to 15 min  in a preheated over (180 C) (depends on the oven). When the edges are slightly golden, take the dough out. Wait for few min to cool, remove the paper and bake it for an additional 10 min.
Spice up your pie with these wonderful flavors


Meanwhile, prepare the filling which requires: 
  • 3 FULL tbsp pumpkin purée
  • 1 tbsp cream cheese
  • 1 tbsp black treacle
  • 1 tbsp molasses (and 1 tbsp of sugar if you want it sweeter)
  • 2 tbsp of cream (35%)
  • 1 egg
  • Spices: you can use whatever you wish, I used fresh ginger, star anise, cloves, nutmeg (all freshly ground) and of course cinnamon. You could also use all spices. A dash of each is enough, but I did use more cinnamon than the other spices, about half tsp.
  • Few drops of vanilla essence
Easy steps to make a wonderful sweet filling

I made the purée a day ahead. Just cut the pumpkin in two, remove the seeds, put it on a tray cover it with aluminum foil, and bake for about an hour and a half depending on the size of the pumpkin. The result is better than the canned one, the roasting gives the pumpkin a smoked taste, and will effect the final result.
I did remove the excess water of the roasted pumpkin so I won´t get a too liquidy purée.

To make the filling start by adding the spices to the pumpkin purée, I think this way the flavors will be better absorbed (you could do so an hour ahead)! Combine the cream cheese, treacle, molasses, sugar (if using) and cream, mix with a hand mixer until well combined. Add the egg and whisk thoroughly for about a minute until you get a homogeneous mixture. Now add the purée and mix well.
The journey of the pie shell from empty to filled then baked

Transfer the mixture to a saucepan and heat slowly while mixing the whole time, turn off the heat when the mixture starts to thicken, this will cut the time the pie will spend in the oven. 
Pour the mixture over the crust and bake for about 30 min (it might take less or more, depending on the thickness of the filling and the type of oven, so keep watching the pies). It will be ready when the center is set.

And here you have it, my version of pumpkin pie, and I have to say I´m pretty satisfied with the result. Happy Thanksgiving!
Glaze with maple syrup and decorate with shaped cookies

Tuesday, November 13, 2012

Praliné Pastes!

Parline nut pastes give an immediate flavor boost to any recipe

The word praliné comes from Praslin, a confectionnary created by Marshal du Plessis-Praslin´s cook.
The cook had the idea of the praliné after seeing a person biting into a piece of melting sugar. In 1680 the  prasline started to be known as Praliné, and ever since it became a must ingredient in the pastry making notably in chocolate houses.

Praline pastes have infinite uses in the kitchen. They can be simply used as spreads on your warm toasted bread, or cookies, or use them as flavor boosters in cakes, muffins, cheesecakes, as a filling for chocolate, or wherever your imagination takes you. 

I made four different types of pranile pastes using  pistacho, hazelnut, hazelnut and chocolate and almonds to create four delicious pastes.  

So much flavor packed in these small oily fruits

For the pistachio paste:
  • 80 g  raw shelled pistachios
  • 70 g white granulated sugar
  • 15 ml water
  • One tsp peanut oil
  • A drop of pistachio essence (or almond essence or kirsh)
  • Green food coloring (optional)
  • Hot water
Start by putting the pistachios into hot boiling water for about a minute, remove them from boiling water and place them into ice water for few secondes, dry the nuts, at this point you will be able to remove the skin. Then place the nuts on a baking sheet and toast them for few minutes, they will be ready when you can smell their wonderful aroma.
Make the syrup by combining water (the 15 ml) and sugar, when sugar is dissolved, it will need few minutes until it starts to change color, at the point you add the roasted pistachios, the sugar might crystalise but  in few mintues it will melt again, even if it doesn´t it´s not a problem.

Transfer the mixture onto a silpat mat or onto a greased surface, and leave it to cool. Transfer the nuts into the food processor and start grinding, when you have a fine powder add the essence, oil and food coloring (adjust the color to your taste), pulse again and you can start adding the hot water one tablespoon after the other  until you get the desired consistency. If you want to use it as a filling, you might want to leave it thick, but you might want it be more fluid if you want to add it to creams, so you will have to adjust the thickness depending on the ultimate use of the paste.

Oily green pistachio paste

For the hazelnut paste you need:
  • 90 g raw hazelnut
  • 70 g sugar
  • 2 g corn syrup
  • 15 g water
Toast the hazelunt, once out of the oven, put them onto a clean towel and start rubbing so the skin comes out, maybe you won´t be able to get all the skin off and it´s ok. 

Make the syrup by combining water, sugar and corn syrup. When the syrup becomes amber, add the nuts and stir with a spatula or wooden spoon, pour the mixture over a silicone mat or a greased surface. Leave to cool.
Amber colored hazelnut paste
Break the mixture into small chunks, place them in the food procesor and grind. First you will get a coarse powder and this point you can stop if you only want a coarse texture that you can add to ice cream or to garnish cakes or whatever you wish.

You can continue pulsing, each pulse of 15 seconds, and mixture will become wet. Scrape down the mixture and stir with a spoon or spatula between each pulse and after 6 or 7 pulses you will get a runny paste!
Expect a nutty, buttery with a roasting taste from this paste

You have your paste ready, but you can go a step further by adding chocolate. I divided my hazelnut praliné into equal parts. I mixed with one half 15 g of grated chocolate and a teaspoon of cocoa powder and a 1/4 tsp of vanilla and mixed until well combined.
Chocolate and hazelnuts is an ideal combination

Finally, for the almond praliné paste:
  • 90 g raw almonds with skin on
  • 70 g sugar
  • 2 g corn syrup
  • 15 g water
Toast the almond for few minutes, let them cool. You can use them with their skin on or as I did remove the skin of the half amount as I didn´t want to get a very dark color.
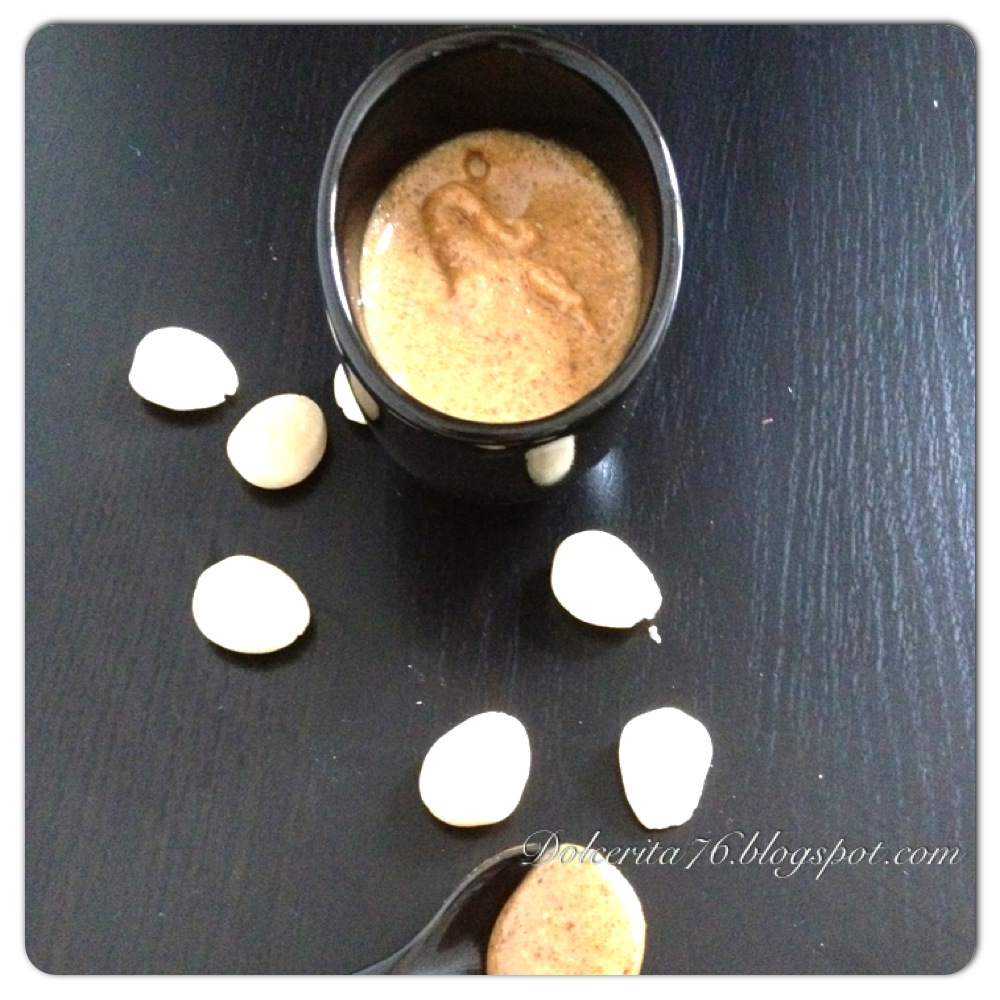
Leave the skin on some almonds to get a  deep colored paste

Now repeat the same procedure you did for the hazelnut but don't add the chocolate. Almonds might take a bit longer to become rather liquid.
Almond praline paste, perhaps the most popular praline

And there you have it, an interesting way to prepare pastes from three delicious nuts. Get creative and use these pastes in whatever way you like!

Make one or all four, the choice is yours!

Friday, November 2, 2012

Linzer Torte: a Symphony of Flavors!

Linzer torte, a delicate elegant Austrian sweet
Austria is the homeland of great musical geniuses like Mozart, Strauss, Hayden, to extremely talented painters like Klimt, to prominent scientists, physicians and psychiatrists like the very famous Freud. The country boasts amazing architecture and marvelous landscapes, but what's more interesting is what Austria had offered to the world of cakes and pastry. It´s where the Sacher torte was created and Vienna is considered as the cradle of danish pastry or Viennoiserie and also the star of the post, the Linzer torte.

Linz, a beautiful Danubian city, and also supposedly the birth place of the Linzer torte (torte meaning cake in German). This cake is considered to be one the oldest cake recipes known in Europe, going back to 1696, but it seems that another author found an older recipe from Verona dating back to 1653.

It is a rich cake, full of spicy enticing flavors, all topped with a sweet tangy raspberry jam. The use of spices in sweet recipes is quite interesting in many parts of Europe, especially in colder European countries. Spices are widely used in Middle-Eastern and Asian countries, but their use is predominant in savory dishes, so it's always interesting to see how each culture values and uses spices differently. I would think that using spices in sweets provides warmth, at least on a psychological level, in long dark and cold nights. Either way, I love spices and welcome their use whenever possible.

There are unlimited recipes of the torte, ones with sugar, others without sugar, some with different type of sugars and some with just cinnamon as the main spice. Eventually, I ended up using a recipe that combines elements from different recipes.

For the dough you need (enough for an 18 cm pan):

  • 1 cup of toasted ground almonds, or hazelnuts (about 140 g, depends on how fine grounded they are)
  • 1 cup of flour (160 g)
  • 1/4 cup of powdered, granulated or even brown sugar (45 g), if you want the dough to be sweeter you can double the amount
  • 1/2 cup of cold butter (112 g)
  • Zest of half a lime or lemon
  • 1/4 tsp of cinnamon
  • 1/8 tsp of ground cloves
  • 1/8 tsp ground star anise
  • A dash of salt
  • Half an egg whisked with some vanilla
  • Raspberry jam (recipe will follow)
Easy to make pie crust
In a food processor combine almonds and sugar, pulse until blended. Add the flour, the spices and the zest, pulse again until well mixed.

Now you can add the butter to the rest of the ingredients in the food processor and pulse until combined or put the mixture into a big bowl and incorporate the butter with the dry ingredients with your hands or a dough blender. When well mixed add the half egg and mix until you have a firm non sticky dough.
Wrap it in plastic and leave it in the fridge for about 3 to 4 hours (or even over night).

Take the dough out, cut it into 2 parts, 2/3 to be used as the base and 1/3 for the topping. On a floured surface roll it out for about a cm thick, move it to the tart pan with a removable bottom. Trim the edges and put about a cup of raspberry jam. You can remove the excess dough from the edges then push it down until it is almost the same level with the jam.
Divide the dough, line the tart pan and fill with jam

On the top you can add strips of the dough, as it is a very delicate dough you can cut the strips, then leave them in the fridge for about half an hour then arrange them as you like, or you can cut shapes and decorate your tart as I did with the small torte I got from the remaining dough.

Brush the dough with some cream and sprinkle with shaved or slivered almonds. Leave it in the fridge for half an hour before you bake it in a preheated oven (180 C) for about 40 to 50 min or until the dough has a nice golden brown color.
Decorate with pastry strips and flaked almond, bake until golden

The jam I used fro the recipe was made the same day as the torte. I did not want to use store-bought jam, not that there is something wrong with that and by all means do buy one already prepared if you don't have time, but I wanted the recipe to be special so I decided to make my own, very easy to make and tasty jam.

For the jam I used:
  • 170 g raspberry (fresh or frozen)
  • 100 g of sugar (or 170 if you want it sweeter)
  • The seeds of a half vanilla bean
  • Squeeze of a lemon juice (just few drops)
Home made jam, bright color and sweet result

Combine all ingredients in a heavy bottom pan, when they start to boil and the raspberry starts falling apart, sieve the mixture (it is easier doing it at this stage) then put the jam back to the pan and leave it to simmer for about 10 minutes until it gets thicker. I didn´t let it get too thick cause it will go back to the oven and it might get too thick and dry during the backing. 
Flaky, spicy and sweet pie

When the torte is cooled just dust it with some powdered sugar and enjoy a crumbly, sweet and flavor rich dessert.
Cute small Linzer torte perfect for individual servings

Saturday, October 27, 2012

Kolacky or Kolace, From Central Europe With Love

Pretty kolaces filled with jam
I often spend time reading recipes or watching cooking shows online or on TV. This is a great source of inspiration for me as I often discover new recipes and learn about exotic ingredients.

I came across kolaches or kolacky, the recipe featured in this post, while looking for new ideas for baked sweets. This sweet pastry recipe originated in several central European countries like Poland, the Czech Repulic and Macedonia among others.

It seems this cookie started as a yeasted dough filled with jam, fruits, or poppy seeds or cream.  With time many variations were made. The cookie and its many variations are still important in celebrations  in several central European countries. 

With the waves of  Polish and Czech immigrants settling in many parts of the USA, the recipe became popular in the New World  by the end of the 19th century and the beginning of the 20th. But as the recipe left its homeland, it underwent some modifications, as such kolacky with cream cheese is a 19th century American invention!

The name kolacky means small cookies in Macedonian, as I am lucky to have friends from all over the world, I contacted my Macedonian friend and asked him about this dessert. Todor, my friend, graciously shared with me his grandmother's recipe of kolace.

I had made pastries made with cream cheese before so I was interested to try the cream cheese version of kolace, but I was more interested in trying my friend's grandmother recipe, after all, the best recipes are those of our mothers and grandmothers passed down through generations and refined through time. 

For the cream cheese colacky you need:
  • 80 g cream cheese (room temperature)
  • 68 g butter softened (20 g of which are salted, if not just add a pinch of salt)
  • 74 g flour
  • 1 tbp vanilla sugar
  • Sprinkle of ground star anise
  • For the filling, use your favorite type of jam
Easy steps to make the kolace
These ingredients are enough to make a small batch of cookies (about 10 to 12). All you need to do is to whisk the cream cheese with the butter, until it becomes light and fluffy using a hand mixer, or an electric one if your are doubling the ingredients. If you need to add the salt do it now, followed by the star anise and  then start adding the flour slowly  in 3 to 4 batches.

You know the dough is ready when it comes all together and nothing is left sticking on the sides of the bowl! The dough needs to rest for at least 6 hours in the fridge or over night.

Take the dough out of the fridge and leave it for about half an hour so it reaches room temperature. On a floured surface, roll out  the dough to 1/2 cm in thickness, then cut 3 x 3 cm squares or circles or whatever shape you desire.
Put a teaspoon of any fruit jam you have in the center of the cut dough. I used cherry, raspberry and grape jam with which I used some peanut butter. Take 2 sides of the dough and fold them over the jam. Once you have all the dough ready put it in the fridge for half an hour, then pop it in the oven and bake them for about 15 min in a preheated over (180C).
Cream cheese kolaces
When the cookies are cooled, dust them with some icing sugar.


Oozing jam from the kolace, inviting sight
For the kolache cookies, todor´s grandma recipe you need:

  • 1 1/2 cup flour
  • 1/2 cup sugar
  • 1/2 cup of melted butter, oil, or lard
  • 1/2 teaspoon of baking powder
  • 1/2 an egg or replace by  30 g of milk or 30 ml (if you are using egg add 1/2 teaspoon of vanilla)
  • Pinch of salt
Traditional shaped kolace
Combine flour, sugar, baking powder, and salt, add the egg and mix then add the oil until all ingredients come together. Let it to rest for about half an hour in the fridge.

Divide the dough into small balls about 25 g each and place them on a baking sheet. With your thumb or a fondant ball tool, make a hole in the balls, fill the hole with jam and bake them for about 15 to 20 min, until they have a golden brown color on the bottom. 

Let them cool for few minutes and sprinkle some dusting sugar.
Very elegant and pretty sweets, but above all very delicious
Here you have it, two different kolacky or kolache recipes with different textures, both very delicious and easy to make!

Friday, October 19, 2012

White Chocolate raspberry caramel Shortbread!

Inviting and tantalizing dessert
Share with your friends and they will come back for more

In the previous post, I shared with you my slightly personal version of caramel caramel chocolate shortbread  also known as Millionaire´s shortbread, I had added some few changes to make the squares a bit wintery and not too sweet.

However, little changes don't always cut it for me, I decided to modify the recipe even further and create a different flavor sensation. The previous recipe calls for the use of dark chocolate, but why not use white chocolate?  As you probably know white chocolate is primarily made from cocoa butter extracted during the process of chocolate making. White chocolate is not to everyone's taste, but I love everything related to chocolate and I decided to give white chocolate a try with caramel shortbread.

Some fruits go better with chocolate than others, a prime example would be berries. Berries offer a perfect flavor combination with chocolate especially with white chocolate as the tartness of berries offset and balance the sweetness of the chocolate.  

I wanted to create a cookie sandwich with a whitish bottom layer, a rose-purple heat and a creamy white top. The first time I tried to do it, I used brown sugar to make the caramel and when I added the raspberry, the resulting caramel was brownish and too sweet. I adjusted the process until I got the result I wanted.

Enough talking now and let´s start with the recipe making.

For the dough you need:
  • 67 g Butter
  • 85 g flour
  • 10 g vanilla sugar
  • 15 g powdered sugar.
As I said in the previous post, there are several ways to make the dough, but I find that the easiest is using a food processor. First mix sugar and butter for few seconds, then add the flour, which I added it in 2 batches. When you take it out of the processor just make sure everything is well blended. Press the dough on a prepared tray (covered with parchment paper), make sure it´s well leveled then put in the freezer for half an hour.

Prick it and bake it for about 20 min (it depends on the oven so check from time to time). 
When it´s lightly brown on the edges then it´s ready. Set it aside to cool.
Easy to make and packs a wonderful taste

What you need for the caramel:
  • 35 g butter
  • 20 g vanilla sugar
  • 5 g light brown sugar
  • 20 ml of condensed milk
  • 15 ml cream
  • 35 g seedless raspberry purée
Raspberry caramel, perfect color and flavor
On a low heat, melt the sugar and butter in a heavy bottom sauce pan, when well melted add the milk and the cream, stir carefully or just swirl the pan, when it gets thick, start adding the raspberry purée. Add slowly until you get the desired color, and let it get thick again, it should be pourable but not runny.

Pour the caramel over the cooled dough, leave it until it gets to room temperature then put it in the fridge to set. 
Fruity, buttery and chocolaty, a perfect combination
Meanwhile prepare the chocolate layer. Melt 150 g of chopped white chocolate or buttons, on a double boiler, and pour it over the caramel.

Leave the chocolate layer cool down, but cut it before it is totally set, or just score it. 
When chocolate is set, cut the squares with a serrated knife, and there you have it, a refreshing, crumbly and sweet treat.
Enjoy these cookies with your daily cup of coffee

Wednesday, October 10, 2012

Caramel Chocolate shortbread or Millionnaire´s shortbread

Rich, buttery, chocolaty and sweet, a perfect dessert
My first experience with caramel chocolate shortbread was three years ago. I found them in a local delicacy store, they looked too tantalizing to dismiss. I am glad a bought a few; indeed they were amazing. Unfortunately, they are not readily available and if I were to rely on stores to quench my appetite for these delicacies, well I would hungry! No such thing is allowed under my watch! Do your ingredient hunting and prepare yourself to make these chocolaty treats at home.

Shortbread is not new to the culinary world. In fact, it has been made since the 16th century in reference to a crumbly type bread. Shortbread relies on the taste and the texture that butter infuses in the dough. Earlier recipes, like the Elizabethan ones, had oatmeal as a main ingredient and was popular among unprivileged classes. Almonds were sometimes added to fancy things up, but the main ingredients were simple including   wheat flour, butter and sugar. Back in the days, sweet cookies were mainly consumed during festive times, especially Christmas, as everything nice and sweet was reserved for such occasions!

Now, we can enjoy those cookies all year long with their endless varieties and ingredients such as chocolate chips, cranberries, nuts among other ingredients. Caramel chocolate shortbread, a decadent recipe that can satisfy any craving soul for comfort, is like a cookie based sandwich  which you will be happy to know how to prepare.

The traditional recipe is made with dark or milk chocolate, but I decide to try something new and make one with white chocolate. For now I will share the dark chocolate recipe first which will be followed by the white chocolate recipe.

The first recipe is the closest to the original, but again, it has a twist. It has a double of chocolate since the shortbread has chocolate too. You can never have enough chocolate, right?
Dark and white chocolate shortbread!
So to prepare the double chocolate caramel shortbread, you will need (makes about 15):
For the dough (18 x 18 cm tray):
  • 67 g butter
  • 8 g cocoa powder
  • 78 g flour
  • 10 g vanilla-infused sugar (I used castor sugar to which I added a pod of vanilla in advance)
  • 15 g powdered sugar
  • A teaspoon of orange zest (optional)
Preparing the dough can be done in several ways: beating the butter and sugar with an electric mixer then add the flour with a wooden spoon or you can mix all the ingredients by hand. However, you can do what I did which is to mix the butter and sugar in the food processor for few seconds then add the flour and cocoa powder, and mix for an additional times, usually not more than few seconds, until the dough comes together, add the zest and mix again for a very short time until all is blended well.

Place the dough on a tray lined with parchment paper to prevent it from sticking and to ease the job of removing it from the tray when baked.

Flatten the surface of the dough, making sure it's even. Like all buttery dough, it is best to chill it before baking; 30 min is ideal.

Before baking the dough, prick it and place in a preheated oven at 180 C degrees for about 20 min. 
The chilled and the baked dough
While the dough is cooling start preparing the caramel, which requires the following ingredients:
  • 35 g butter
  • 20 g vanilla-infused sugar
  • 5 g dark brown sugar
  • 20 ml condensed milk
  • 20 ml cream
  • 7 ml of corn syrup
  • 1/2 tsp of vanilla
In a heavy bottom sauce pan, combine sugar, butter and corn syrup, place over a gentle flame and wait for the sugar to dissolve with the butter, then add the milk and cream. Let the mix simmer for few minutes until it starts to thicken, stir gently from time to time, then add the vanilla.

I cut the amount of condensed milk and used cream to get a balanced caramel taste and not a sickly sweet taste. 

Pour the caramel over the cooled dough. Let it cool at room temperature then place in the fridge until it is well set.
Pour the caramel on top of the baked dough and let it set
And now for the final adornment, the chocolate layer. Pick your favorite chocolate type (dark, semi-sweet, milk,...) and brand and melt around 100 to 150 g of it in a double boiler or bain-marie.  When melted, pour over the caramel and let it set. 
The set caramel on top of the shortbread and the set molded chocolate
Leave it to cool and try to cut it before the chocolate completely hardens, because if you do it will crack and the slice won't come out as nice as you wanted. It's not an easy job, but it will be made easy if you use a serrated knife.
The various layers of the this chocolate treat

If you examine the pictures you will notice that the chocolate on top looks like a piece of chocolate bar, which is not difficult to reproduce. Place half the amount of melted chocolate in a silicone molds which has a chocolate candy bar look. As they set they take the shape of the mold. Layer the molded chocolate over the shortbread pieces, brush lightly with melted chocolate to the layers together. This is an optional decorative step, you can simply pour the chocolate, let it set, slice it and serve it as such.

A chef once named these chocolate shortbread cookies as millionaire´s shortbread because they are very rich and indeed, it cant get any richer!

While you wait for the white chocolate caramel shortbread version, sit back, relax and enjoy the chocolate ones with coffee or tea.
Perfect for a 5 o´clock tea!

Monday, October 1, 2012

Znood al Set or Lady´s Arms! زنود الست

Znoud al Set, a sweet, crispy and delicious sweet
Previously I showed you how you can make, in the comfort of your home, traditional Arabic clotted cream (kachta or achta). This cream is a basic in many desserts, once you get the hang of it you can make your own pairings and combinations based on seasonal products or your personal preferences.

I decided to keep things simple yet elegant and delicious and I went with the choice of using the cream with phyllo pastry. One of the traditional recipes that call for the use of both ingredients and is quite popular in the Levant countries is called Znoud al Set which basically means Lady's Arms.

While I have the patience to prepare Arabic clotted cream at home, preparing phyllo dough at home is a different level of complexity. It's not that the ingredients used in the pastry are complicated, but it's almost impossible to achieve the level of thinness needed for phyllo dough using home utensils. Luckily phyllo dough is widely available in supermarkets so by all means, buy from a brand you trust. This paper thin dough is to make baklava but lends itself marvelously for a wide array of sweet and savory recipes.

It is believed that the art of stretching the phyllo dough into a papery thin pastry took place in the palaces of the Sultans of Istanbul. As for the dessert featured in this post, the story of its birth goes like this: In a dinner of the governor of the Ottoman provinces of Tripoli and Lattakia (1798-1833), Mustapha Agha Barbar, a new dessert was served, kachta rolled in phyllo pastry and that had the shape or the appearance of arms, so one of the guests suggested that these sweets should be called Znoud el set (or lady´s arm); perhaps to honor the big number of women guests to that dinner party, and so it was!

Traditionally, the phyllo is stuffed with kachta and rolled in cylindrical shape similar to the Chinese spring rolls. The rolls were then deep fried in oil and drizzled or dipped in sugar syrup. The rolls are then garnished with pistachios and rose petal jam.

Inspired by the traditional recipe, I made Znoud al Set but added a few twists here and there.  In order to prepare the recipe you will need the following (serves about 7):

  • One pack of phyllo pastry, thawed
  • A cup and a half of kachta 
  • Sugar syrup
  • Chopped pistachios
  • Whipped cream (about a cup)
  • Rose water or rose essence
  • Figs
  • Melted butter
For the syrup you need:
  • 2 cups of sugar
  • 1 cup of water
  • Tbsp of dried rose petals
  • 2 cardamom pods
  • Peel of half a lemon
  • Tsp of orange blossom water 
Flavoring the syrup with aromatic ingredients will make it much more interesting
In order to prepare the sugar syrup you need to combine all ingredients together except for the  orange blossom water. Simmer on a low heat for about 10 to 15 min. After removing the syrup from the heat add the orange blossom water and a squeeze of lemon juice. Don't add the orange blossom water while the mix is still boiling, because the delicate essence of orange water would be lost with the heat.

Now you would want to prepare the rolls. Brush a sheet of phyllo with melted butter and fold it in 2, repeating this process with another sheet. Place on top of each other, place a tablespoon of kachta in a raised cylindrical fashion towards the end of the dough making sure that the cream doesn't touch the edges.
Fold the sides of the dough over the cream and roll the dough over the cream starting with the side closest to the cream and going outwards. You might be tempted to put too much cream inside the roll, don't do that. The cream will leak out during cooking.
Easy steps to make the roll


Brush the finished rolls with some butter again and place them on a baking tray in a preheated oven (200C) and cook them for about 20 min or until golden brown. You can fry the rolls in vegetable oils instead of baking them, and they will be delicious, but I prefer to bake them, it is a slightly healthier option, yet nonetheless as delicious if not more.

After being baked, traditionally, the rolls are dipped in sugar syrup. I decided to avoid that, and drizzled just a bit on top. More syrup can be added while serving the rolls.

Figs, a typical fruit of the Middle East, work so well in this recipe
You can pair the rolls with several fruits, but I think figs go really well with them. The sweet and tasty Mediterranean fruits can be cut in halves and  lightly sauteed in butter until they are lightly brown or you can just serve them fresh.

Light whipped cream adds a special note to the recipe

Finally, you can serve the znoud al set with some extra cream on the sight for extra indulgence and decadence. The whipped cream doesn't need to be sweet, but it is much more interesting if you flavor it with few drops of rose water.

Arrange the different ingredients in a serving plate, decorate as you find suitable and there you have it, a tasty sweet from the East.

You can try and you might succeed and taking a bite of all the ingredients at the same time. The mellow sweetness of the figs complement the crispy butteriness of the rolls and the milkiness of the kachta. The whipped rose infused cream adds this special light note at the end. Make sure you try this recipe, you will love it!

A sweet treat that combines complementary tastes and textures