Monday, April 22, 2013

Four layered strawberry tartelettes!

An assortment of mini strawberry pies

Strawberry must be one of my favorite fruits. I love their juicy tartness and their aroma that fills the air with an inviting and too hard to resist scent. Strawberries are one of the fruits that are great fresh on their own, but they become greater with a sprinkle of sugar as this enhances their sweet flavor.

I always look forward for strawberry season and when the season arrives I always keep some in my fridge to consume fresh during the day to benefit from the healthy dose of vitamins they contain  body or to use with the myriad of desserts these red berries go greatly with.

Decorate to your liking, strawberries offer you lots of possibilities

I also love pies or tarts whether a normal  sized tart  or mini ones as the french call them tartelettes.

So what better recipe for fresh strawberries than these cute tartelettes with pastry cream?
For the crust you need ( enough for 10 to 15 pieces):
  • 200 g flour
  • 100 g cold butter, cut into small cubes
  • 30 g sugar
  • dash of salt
  • 1/2 tsp lime zest
  • Beans of half vanilla pod (or vanilla extract)
  • Ice cold water
Combine flour, sugar, salt, vanilla and zest in a food processor, pulse until all combined. Add the butter and pulse again until you get a sandy mixture. Now you either can slowly add the cold water into the food processor, or transfer the mixture into a larger bowl and add the water one tsp at a time  and mix until the dough forms a ball. The quantity of water will depend on the flour and butter, I only needed to add one tbsp!
Form a disk and wrap it in plastic, put in the fridge for at least an hour (you can make it a day ahead).
Roll your dough and cut to fit into mini tart shells. Blind bake in a 180 C oven (preheated) for 10 to 15 min, until dry and with slight golden color on the edge!

The different components of  your layered tartelletes

For the pastry cream (creme patissiere):
  • 250 ml milk
  • 50 g sugar
  • 1 egg
  • 20 g corn flour
  • zest of a lime
  • few drops of vanilla essence
Heat the milk in a sauce pan, in a bowl whisk the egg with the sugar, lime zest, vanilla until almost double in volume, then add the flour. Mix well then slowly add the hot milk (not boiling) add it very slowly over the egg mixture, and whisk non stop! Put the mixture in the pan on soft heat and keep stirring, it will start thickening after few minutes. When it drops slowly from the spoon then it´s ready; it will continue cooking until it cools down so you don't want to get it too thick while it is still on the flame.

For the strawberry sauce:
  • 150 g strawberries
  • 40 g sugar
  • Tbsp lemon or lime juice
  • A vanilla pod (I used the one left from making the pastry)


Fruit, cream, fruit sauce and pastry shell, 4 layers for one great desset
Dice the strawberries and combine with the other ingredients and let it simmer on a very gentle heat for about 20 to 30 min. Make it a day ahead as this will allow all the flavors to combine and it will taste better.

Get your ingredient ready for the final assembly

Time to assemble:

Put about a teaspoon of the sauce in the bottom of the shell or the enough amount to cover the bottom. Cover with the cream and top with strawberry. I called this dessert as four layered strawberry tartellete because it has four layers from top to bottom: the fresh fruit on top followed by the rich smooth pastry cream and the refreshing strawberry sauce all carried by a buttery, fragrant and crumbly pie crust.

To prevent the strawberries from drying while they cool in the fridge you can brush with a glaze of heated strawberry jam or you can do what I did. I had around 4 tablespoons of juice left from the strawberry sauce, so I soaked 1/4 tsp of gelatin powder in a tiny amount of water, heated the juice and added the soaked gelatin and  stirred till  it dissolved well. I allowed the mixture to cool down before brushing it on the strawberries. This surely gives the fruits a beautiful shine and protects them from drying before you have the time to consume them all.

A note about decoration. There's really no rule for that, just do what feels more appropriate. I tried to make different patterns to inspire you, but I am sure you can come up with more creative ideas.

Beautiful, elegant and tasty tarts
And here you have it, a crumbly, creamy, tart and sweet dessert. It is really hard to resist!

Sunday, April 14, 2013

Caramel au beurre salé or salted caramel!

Jars of delicious caramel, ready whenever you need to use it
Whenever you hear someone talking about caramel your taste buds are stimulated or whenever you come across a recipe that calls for the use of caramel you will know that for sure this dessert will be extra special. Take a humble dessert, drizzle it with some caramel sand immediately you will take it to a higher and more complex level.

Dark, creamy, aromatic, sweet but with a salty hint

Sugar caramelization started in France during the 17th century, and since then this creation has found endless uses and was featured in many recipes that took advantage of the unique flavors caramel imparts to recipes.

One of my favorite ways to enjoy caramel is through the traditional French recipe: caramel au beurre salé  which basically means salted butter caramel or simply salted caramel. It is made either with salted butter or you can add salt if you are using the more common unsalted butter.

A thick, decadent sauce that adds lots of flavor to many desserts

Here's an easy way to make this heavenly and decadent sauce. Be careful, the sauce is highly addictive.

Here's what you need to make almost 2 cups:
  • 150 g sugar (white granulated)
  • 40 g water
  • 60 g cold butter
  • 300 ml cream (35% fat content, or more)
  • 3/4 tsp fleur de sel (if not available use regular salt)
Combine sugar and water in a heavy bottom saucepan. Let the sugar dissolve completely without touching it, just swirl to make sure all the sugar melts. If you whisk the sugar while melting, this will not allow it to melt nicely, you will have clumps and crystals which will prevent you from having the smooth and creamy caramel you long for.

After few minutes on the stove the sugar will start changing color, when it reaches a nice amber color and you can clearly smell the characteristic caramel aroma, it's time to add the cold butter (it´s better if it's cold as this will stop the sugar from further cooking and burning) stir a bit then add the salt, as it melts at the end add the cream.  Be careful when you add the cream as it might splatter, so keep your face away! Stir well after adding the cream, and if you want a thicker caramel leave to reduce for few more minutes on a gentle heat to avoid burning your caramel.

Pour it in a glass container and let it cool. You can preserve it in an air tight jar and kept in the fridge.
Now you have a great sauce to goes really well with so many desserts!

Suitable for so many desserts, make sure to have some on standby!

Wednesday, April 10, 2013

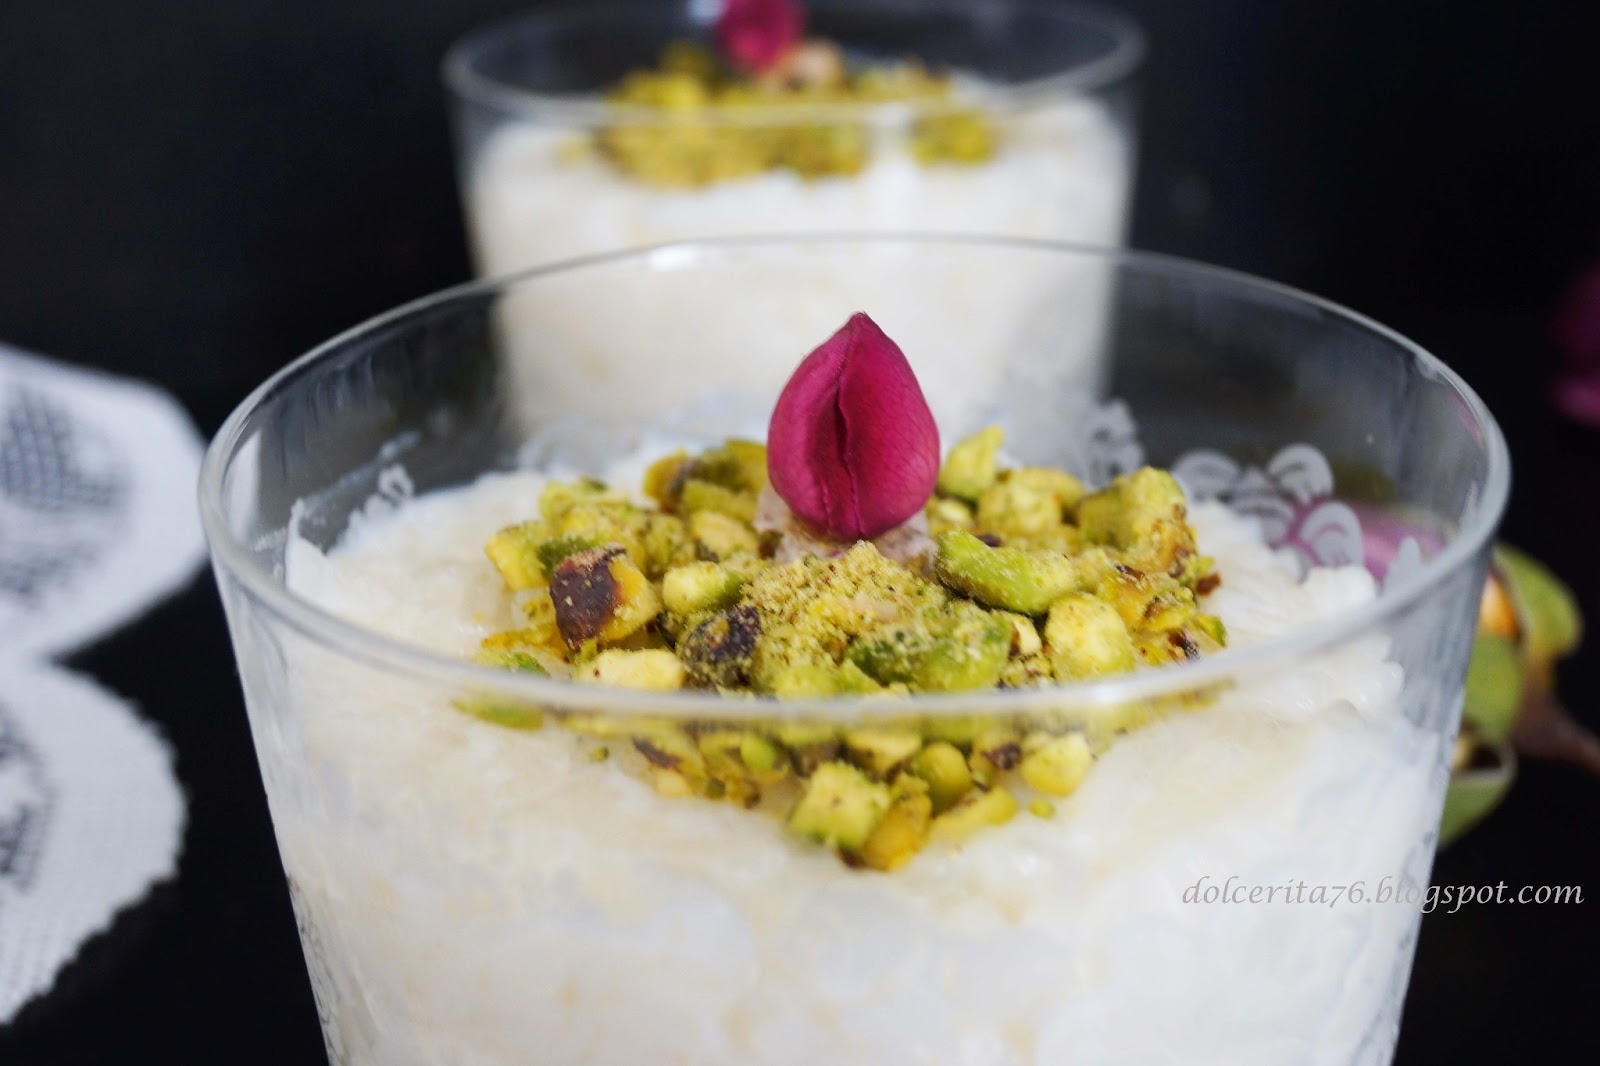
Rice pudding, a childhood memory!

Cold, sweet, and refreshing rice pudding
As a child, rarely were the times where I opened the fridge and didn't find small cups of my mom's fragrant rice pudding.  When making yogurt, she would always set aside some milk to make this family favorite. What made her rice pudding special is the flavorings she added. Sometimes she would use rose water and cinnamon but quite often she would perfume the pudding with rose geranium leaves that impart a distinctive and very special taste to this humble pudding.

Rice puddings were enjoyed since ancient times, and it seems their roots were in grain pottages that were made by middle eastern cooks. Even in our modern times, rice puddings are extremely popular across the world with many variations and adaptations to suit local tastes.

As an international dessert, rice pudding is known through different names like kheer, firni, shola, to name a few. Probably the secret of this recipe's success is that from two basic ingredients you can create endless variations, and you can even create even a vegan version that uses milk derived from plants such as soy.

Rice pudding used to be recommended to people who had stomach illnesses for its easy digestion and health benefits so if anyone is looking for a delicious, nutritious and healthy recipe, look no further! 
Rice is the main ingredient of this dessert absorbs all flavors you add to it

For the classic rice pudding for two individuals you need:

  • 100 g of rice (I used jasmine rice)
  • 250 ml of milk (plus 3 to 4 tbsp water, the quantity of liquid will also depend on the rice type)  
  • 40 g sugar (I used vanilla scented)
  • 2 bruised cardamom pods (use 3 for more aroma)
  • 1 tbsp rose water (or more if you wish)
  • 1 tbsp cream (optional)

In a saucepan combine the sugar, rice, milk and cardamom, mix well and put on a medium heat.  When it slightly starts heating lower the flame and let it cook for about 1/2 hour, stirring frequently, when the rice is fully cooked remove the cardamom and add the rose water and cream (if you are using it). Though I believe the cream  adds more flavor and makes the texture more velvety you can skip it if you you are watching your calories.

Fill your pudding in the serving cups, let them cool down before you chill them. Rice pudding taste better the second day when it is set, cool and refreshing.

I like to decorate the cups before serving them with some coarsely chopped pistachio nuts and rose petals or small rose buds. Of course, you can decorate your cups anyway you see fit.


I hope you try this recipe, it is really easy and delicious and though this cold refreshing pudding is suitable for hot summer days it is enjoyable anytime of the year! Bon appetit. 


Saturday, March 30, 2013

Maamoul: Easter semolina cookies معمول

A special delicacy served during Easter, Maamoul

Across the world major religious or cultural events are usually marked by special foods and sweets that add another dimension to the whole occasion. If you follow my blog you would know that Christmas time of the year, but equally important to me is the holy week before Easter.

As far back in time as my memory can go, I remember that during this week the family gathers, namely my mom and aunts to prepare a special and really delicious sweet usually enjoyed this time of the year: Maamoul (معمول) as they are called in Arabic, or semolina cookies.

Three fillings, same exquisite dough
The whole ritual of making these cookies was so exciting. At first was the all important ingredient shopping which mom would make. She would choose those ingredients that meet her standards.

The dough needs to rest overnight, so she would mix all the ingredients in the evening to let the semolina flour come together with the rest of the ingredients. When done with the dough, she would prepare the fillings. Traditionally, there are three types of fillings: dates, pistachios and walnuts. At this stage, my sister, brother or myself would help her grinding the nuts or mixing the dates with some butter till they soften.

The morning after, D day comes. My mom wakes up early, joined by my aunts. Soon, we all pitch in.

When everything is ready, we all sit around and start shaping and filling the cookies, and wait patiently until all the trays are filled with the elegantly shaped cookies waiting to be baked.  Sometimes we would bake the cookies at home but more often we would take them to the bakery so they can be baked more rapidly in the larger ovens.
Baked, they would be sprinkled with powdered sugar after they cool down and then filled in jars. When Easter comes, you are expected to greet your visitors with Maamoul and many housewives would share tips and tricks on how to make the best cookies.

I have been away from home for many years, and every year at this time, I miss being with my family and being part of the fun of making Maamoul and savor the sweet reward afterwards.

Nevertheless, you can, like I did, make these cookies, even if you are not planning to make large quantities for your large and extended family. There are quite a few steps to follow, but the result is well worth it.

Here is what you need:

  • 450 g coarse semolina
  • 120 g fine semolina
  • 1/2 tsp mahlab cherry (if not available use few drops of almond extract)
  • 1/2 teaspoon mastic (if available)
  • Dash of salt
  • 210 g melted butter (warm)
  • 120 g sugar
  • 1/2cup of liquid, you case use water, rose and orange blossom water (together) or milk, I used half rose and half orange blossom water 
The dough and the fillings

First you have to combine the semolina, sugar, mahlab, salt and mastic, mix well then add the butter. You have to mix well with your hands or with a mixer using flat beater, mix well for at least 5 minutes. Leave it to rest for  4 hours, mixing it from time to time.

How the dough should look eventually

After 4 hours you need to start adding the liquid. At this stage I would use the hook tool to mix, or you still can use you hands, start adding the liquids slowly, mixing thoroughly .  When you mix with your hands and especially when you use orange blossom water, you would have a very biblical feeling and your hands would smell amazing!

Leave the dough over night or at least 8 hours. After that time, some kneading is needed again:  first with hook tool for about 5 to 8 min, then use your hands to get a smoother dough (you can do it all with your hands but of course the machine makes it a bit easier).

Now that the dough is done, we are ready to fill and shape.

For the shaping we use special moulds which are readily available in the Middle East, but of course not so in Europe. If they are not available, you can decorate the cookie balls with a crimper and get excellent results.

Moulding, filling and shaping

For the walnuts filling you need:
  • 100 g  coarsely ground walnuts
  • 1 1/2 tbsp sugar
  • Rose and orange blossom water (almost a tbsp of each)
Mix everything together and let it sit for a bit

For the pistachios filling you need: 
  • 100 g coarsely ground pistachios
  • 1 1/2 tbsp sugar
  • Rose and orange blossom water (almost a tbsp of each)
Mix everything together and let it sit for a bit

For the date filling you need: 
  • 100 gr Date paste (you can buy the mature date remove the pits and grind them)
  • 1/2 tsp of cinnamon
  •  1/2 tsp of nutmeg
  • 1 tsp butter
Add the spices to the dates mix then add the butter and mix well.

Different shapes same great taste

You can make big or small cookies. I prefer the small ones but you can try both and stick to the ones you prefer.
At first you need to make a small ball of dough, flatten it in the palm of your hands till it is less than 1/4 cm in thickness. After which, you put the filling in the middle of the dough and bring the edges together to close it. Alternatively, you can make a hole in the dough ball, fill it with the filling you desire then bring the edges together and close the ball.

From left to right: Pistachio, dates, and walnuts cookies

Once you fill your tray, bake them in a preheated oven (180C) from 10 to 15 min, once they are golden brown on the bottom and just dry on the top.

Take them out and leave them to cool a bit, then sprinkle with dusting sugar or you can do this step just before serving the cookies!
Maamoul covered with dusting sugar, a pure joy!

Thursday, March 28, 2013

Coulant au chocolat or molten lava cake, with a surprise!

Chocolate wrapped in chocolate, a soft oozing tender heart waiting to be released. That's the promise of the molten chocolate cake. You grab your spoon and dig in, releasing a chocolate flow from the cake casing. What an evocative sight! I can't imagine someone would be able to resist this sight without being taking a bite, no matter how small!

The French chef Vongerichten claimed the creation of this delicacy in 1987 in New York city, but the other French chef Jack Torres disputed this claim saying it was created in France.
It has been suggested that the well known French chef Michel Bras, after a day skiing with his family, went home and enjoyed a hot chocolate that warmed them all up, and he started to think about transferring this heart warming moment to his food recipes.

After 2 years of experimentation he developed the coulant au chocolant. Since then, it became a must have and an extremely popular dessert across the globe.

With time this recipe has been copied and simplified. I also had my take on this recipe and share with you a modified version with some additions. The result is amazing and you will find it hard to resist doing the dessert over and over again.


  • 100 g chopped dark chocolate (at least 70 percent)
  • 2 eggs
  • 35 g sugar
  • 35 butter
  • 20 g flour
  • 5 g freshly toasted and ground almonds 
  • few drops of coffee liquor
  • The seeds of half vanilla bean
  • Lindor chocolate (use any flavor) optional
  • Some butter and cocoa powder to grease the ramequins
First start melting your chocolate in bain marie or microwave, once melted add the butter and let it melt with the heat of chocolate. Whisk the eggs, vanilla and liquor then add the sugar and beat well until all combined.

Slowly add the chocolate to the egg mixture and mix well, then add the flour and the almonds and mix again until all well combined.

Grease your ramequins and cover them with cocoa powder, pour some of the batter then put the lindor then cover it with more batter, fill only 2/3 of the ramequin.
Chocolate still bubbling!

Heat your over to 240C, and place the ramequins in the fridge for at least 15 min. Bake the coulant for 10 min. Take out and leave it to cool for 5 min then serve it with ice cream if you wish.
Lindor heart, coconut flavor

You can easily freeze the batter. I froze some batter for five days and then took out of the deep freeze, put it in the fridge for a day and bake the following day. It will taste great. I didn't try the deforst option in the microwave, so I wouldn't know if it works. Either way, if you freeze the batter, do as I did and you will enjoy the coulant as if it were freshly made.


Once you try the recipe you will want to make it everyday, it is so easy to make and tastes so good!

Thursday, March 21, 2013

Welcoming Spring with decorated cookies!

It´s spring time again, and though the last winter storms may linger, you know that all too soon nature will once again put on a most sublime and colorful dress.

To celebrate this special event, I decided to bake some cookies and decorate them in a way that pays tribute to spring colors.

I made two batches of cookies, each flavored differently. The first one is the rose petals and nuts cookies (I made these on Valentine) while the other batch consisted of spicy orange and vanilla cookies (recipe to be shared soon).

I will leave you with some pictures of the spring cookies! They will do the talking.


Tuesday, March 19, 2013

Pancakes with a carrot cake flavor!


If I had to choose my favorite cakes,  definitely carrot cake would be among the select few. Although making a basic carrot cake isn't too complicated, its decoration and finishing touches are often time consuming.
So whenever I crave the heavenly taste of carrot cake  but lack the time I resort to a shortcut recipe I developed: carrot cake pancakes!


Crepes and pancakes have deep historical roots. In fact, they go back as far as the Roman times. Back then they prepared the Alita Dolcia (another sweet in Latin), considered as the first form of pancakes.

As time passed, each nation and region added something special to the original product, depending on their social customs and what their land offers.
A Swedish friend told me that  pannkakor (or pancakes) are enjoyed on Thursday nights with some jam as a dessert after the traditional pea soup.
Along  with crepes pancakes were linked to Shrove Tuesday or Thrurday which is the time when Christians prepare for the lent season, a time where the consumption of dairy products is discouraged.


 As much as I love pancakes preparing them the same way over and over again can get boring, that's why I never follow a recipe strictly and I always vary and add my personal touches. Recently I have been making pancakes with carrots and trying to recreate the carrot cake taste. Although the texture will never be the same but the aroma is almost the same and the taste is quite similar.


 Now let me tell you what you need for these delicious pancakes (makes 10):

  • 130 g flour (about a cup)
  • 120 ml of buttermilk (milk would also be suitable)
  • 50 g cream cheese
  • 1 egg
  • 1 tsp vanilla extract
  • 1 tbsp of sugar (or you can use 2 if you want a sweeter result)
  • 1 tsp cinnamon
  • 1/4 tsp each of ground nutmeg,  star anise and cloves (or use your favorite spices)
  • 1/4 tsp salt
  • 40 g pineapple purée
  • 100 g of finely grated carrots (about a half cup)
  • 2 tbsp of slightly roasted coconut (optional or you can use pecans or walnuts)
  • 3/4 tsp baking powder
  • 1/4 tsp baking soda
  • 1 tbsp of melted butter (or vegetable oil)

Mix the dry ingredients together (flour, spices, salt, baking powder and baking soda and coconut). 
In a separate  bowl mix your wet ingredients ( the egg, cream cheese, vanilla and milk) together until well combined.


Create a hole or a well in the center of the flour mixture, add the butter and the wet ingredients mixture, mix well.  Finally incorporate the grated carrots.
Let the mixture rest for some time allowing the flavors to develop (you can leave it in the fridge for 20 min).


While the batter is resting, you can prepare a cream cheese topping to go with your pancakes. It's dead easy to make. Simple use 4 tablespoons of cream cheese to which you add a dash of cinnamon, a tablespoon or two of powdered sugar and a tablespoon of maple syrup.

Cooking pancakes is simple. People often worry that the batter will stick, but if you butter your pan or spray it with a cooking oil it won't.
Heat your skillet and add a knob of butter, add enough batter so you get the size you want. I prefer my pancakes to be medium sized, I am not a big fan of oversized ones.
When you start seeing bubbles forming on surface of the pancake and the edge starts to color, flip them to the other side and cook until golden brown on both sides.

Serve the warm pancakes with the cream cheese mix,  with maple syrup or with both. Enjoy!