Thursday, August 15, 2013

The cure for summer heat waves: pink lemonade popsicles.


It's the height of summer in Madrid and it's really hot and sunny. When you walk a bit in the sun the heat can be overpowering and you rush to get back home to have a break from the heat. On days like this, the ultimate sweet answer are the easy to make and icy cold popsicles.

I know I am not the only one whose childhood memories include lots and lots of moments spent cooling off with popsicles of all sort of flavors. As a family, we used to sit on the balcony and chat while enjoying lemon, strawberry and chocolate popsicles; our favorite flavors.


Like so many great culinary inventions, it was by chance that popsicles came to be. An eleven year old boy by the name of Frank Epperson left on the windowsill a juice jar with a mixing stick in it. Overnight the juice froze holding the mixing stick firmly in place. This is how the sweet icy sticks saw the light in 1905, but James had to wait until 1922 to market his discovery.

When I made my strawberry champagne cake I was left with some delicious syrup so I thought of adding it to my refreshing homemade lemonade resulting in an super delicious pink lemonade.


These popsicles are so easy to make and with little preparation you will make a beautiful, healthy and cool dessert!

For 6 popsicles (50 ml each) you need:
  • 500 g lemon or lime
  • 250 ml water (or more if you don´t want a strong and intense lemon flavor)
  • 50 g vanilla flavored sugar
  • 4 tsp of strawberry and champagne syrup (click here for recipe) 

Make the lemonade as you would usually do or you can fellow my recipe
Now just add the syrup, stir and prepare your molds. Put the wooden sticks in the molds and fill them. Leave them in the freezer for at least 8 hours or overnight!


That's it, all you need to cool off on a very hot day! Enjoy. 

Saturday, July 27, 2013

Sour cream scones with lavender and lime aroma


Scones date back to the ancient  Welsh who baked small round dough fermented with yeast called bara; apparently meaning bread! However, the word scone seems to come from the German word schonbrot which means fine bread. Therefore, scones are simply small and rounded bread.


Now scones are baked almost everywhere, but with hundreds of different recipes and endless variations in ingredients.  Whatever the recipe, scones should be of a dense but not heavy texture and rather crumbly. They are perfect for breakfast, brunch and tea parties. You can serve them with sweet ingredients such as jams or honey or with the countless cheeses, or with just about anything you like. The sky is your limit.
I have experimented with many recipes, but I've never used the ones with eggs in them (maybe I will try them later on) but  the scones I bring today are so easy to make and very delicious. They are crumbly and soft. There are few steps to follow to get those small baked goods.


Since the beginning of Spring, Madrid enjoys lavender blooms. In almost all the parks I know and even on some highways, lavender plants are everywhere. It's such a pretty sight and it inspired me to use this fragrant plant in some of my recipes including scones. The aroma they gave to the scones is light, fresh and inviting; just what you expect from something you would want to eat for breakfast.


 For 10 to 12  small scones you need:

  • 80 g sour cream
  • 1/4 tsp baking soda 
  • 170 g flour
  • 70 g sugar (I used 35 brown sugar and 35 granulated sugar)
  • 2 g baking powder
  • dash of salt
  • 60 g unsalted butter
  • 20 g milk or cream
  • zest of a lime
  • 1/4 tsp vanilla essence (optional)
  • 1/2 tsp (or tsp for more intense flavor) dried or fresh lavender flowers

First add the lavender to the milk and heat them in the microwave for few seconds, and leave them to steep. Then mix the sour cream and baking soda and set aside.
Sift the flour, salt and baking powder.
Combine flour mixture with the butterand mix with a dough blender or put the ingredients in blender and give it few small pulses. Stop when you have big crumbs and don´t over-mix. You also can do this step with your fingers, working quickly so the butter won´t melt. Make a well in the center add the sour cream and 5 g of the milk lavender.


Mix roughly with a wooden spoon or a knife, then flour your work surface, drop the dough and give it a soft knead (just enough so it comes together). Flatten it with your hands or a rolling pin, and cut small circles. Transfer them to your lined baking sheet, brush them with the remaining milk and bake them in a preheated oven (200 C) for about 10 to 12 min, or until they are golden brown.


I found those beautiful strawberries to go with the scones, over a creamy layer of mascarpone! I also love them with butter and sour cherry jam! They are perfect for breakfast, but just as good any time of the day!

Thursday, July 18, 2013

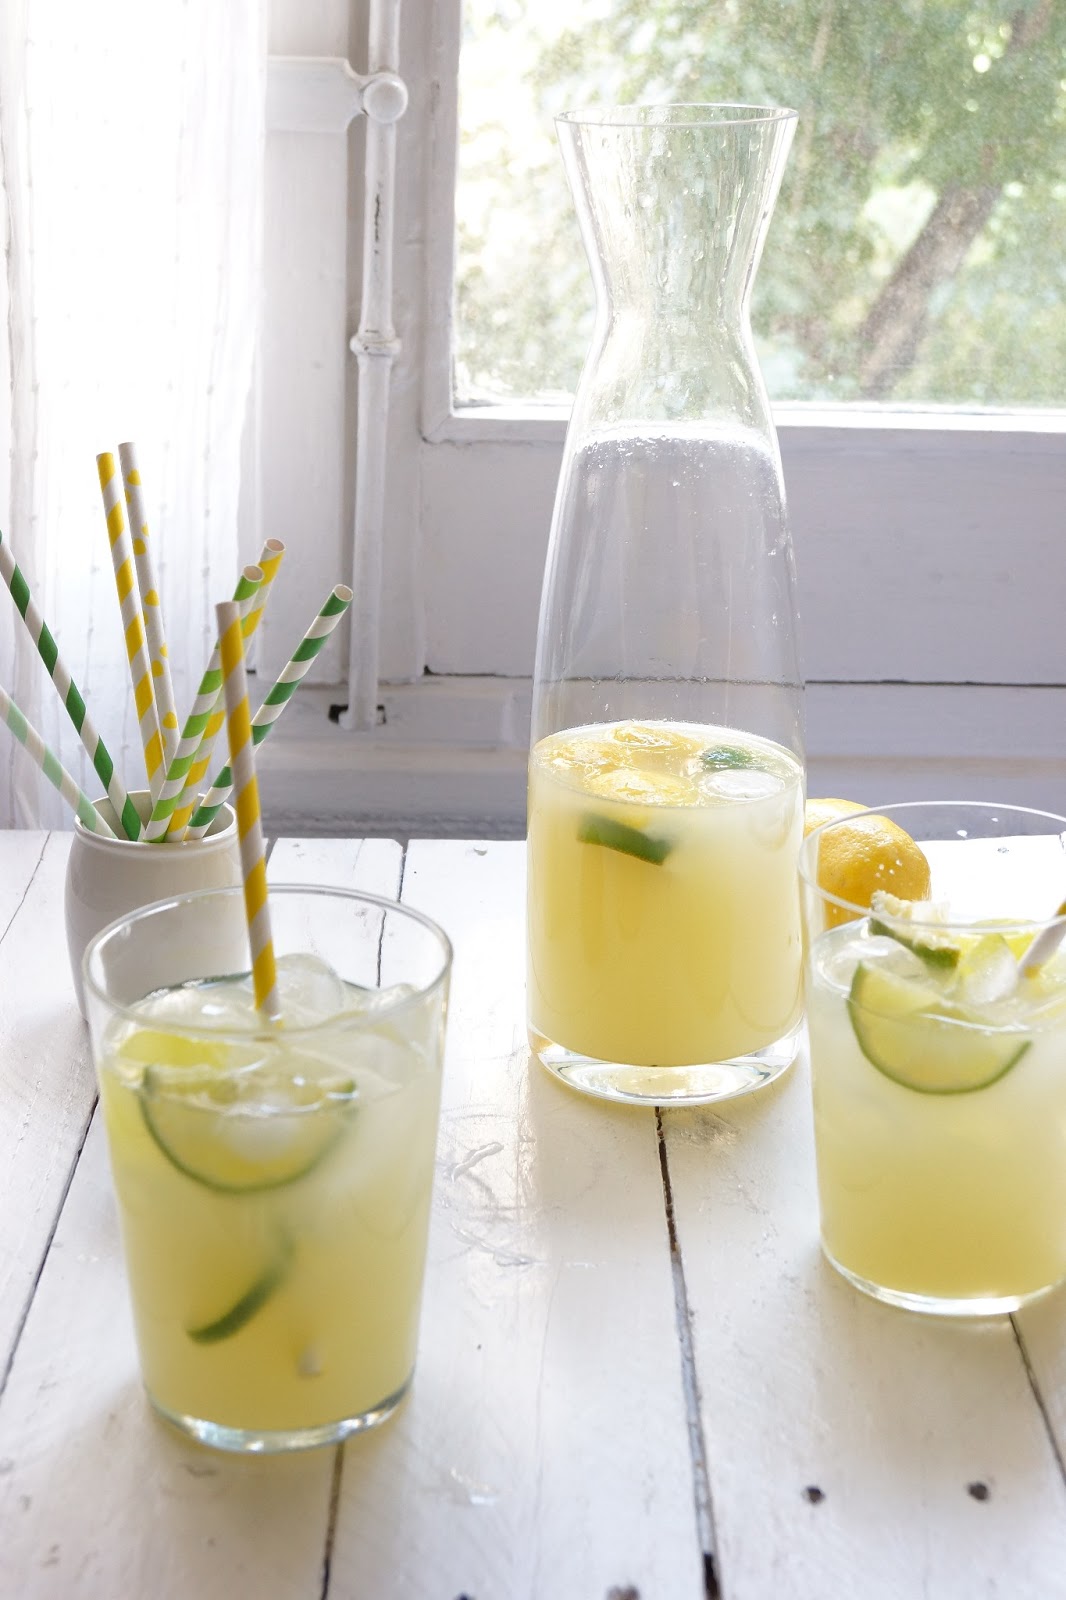
Lemonade for the hot summer days, my mom's way!


In Madrid it can get really cold in winter and scalding hot in summer. The past couple of weeks were very hot and as I get home after work I long for something cold and refreshing.

As much as I love baking, I am not really keen on the idea these days, and when I do, I do it early in the morning when it's cool and fresh. .


But what is ideal for summer days and nights are the light and refreshing drinks or desserts and ice cream.

And really, what´s better than a glass of fresh and cold lemonade to cool down the thirst of a hot summer day?

I remember when I was a child, my mom used to make big jugs of lemonade, but hers was different. While others would simply squeeze the juice and add sugar, mom did it differently.


She would clean the lemons very well, cut the tips, then cut each lemon into 8 cubes, add the sugar, leave them for an hour or so in the fridge.
Theى she would squeeze all the juice using a masher or her hands. The result was different, an intense lemon flavor, so fresh and vibrant it used to make my mouth water just by seeing and smelling it.


So in this post I will show you what I always saw my mother doing which is not the easiest way to do it, but for me it´s THE WAY.

For 3 to 4 servings you need:

  • 1 kg lemon and lime 
  • 100 g vanilla sugar (or regular sugar)
  • 500 ml of water
  • ice

Wash the lemons with hot water, dry them, cut the tips then cut the fruit into 8 pieces, put them into a big bowl. Sprinkle the sugar, and mix a bit. Put them in the fridge for about an hour.


Now use your potato masher, a pestle or your hands and squeeze hard, after few minutes you will have around 500 ml of juice, at this point the whole house will smell great. Strain the juice, add the water and you are ready to serve with ice and lemon or lime wedges!


Monday, July 1, 2013

Strawberry and champagne layer cake for the 1st year of blogging!


A year ago I created this blog and I embarked on a beautiful journey. Though my passion for food was great to start with, but during this year, the passion grew along my skills and techniques. I learned a lot from all the comments and reviews and continue to learn from everyone who share my love and passion for food, especially sweets.

The spirit of sharing recipes with people across the world is hard to describe; it is overwhelming. It fills my heart with joy. I got inspired, developed and created recipes throughout this year, playing with ingredients I am used to and love and even some new ones. Hopefully, the coming year will be just as rewarding as this year has been.  

To celebrate my first year of blogging, I thought of a recipe worthy of the occasion. I decided to use champagne as it is the drink of choice in celebrations, complemented by strawberries.
Keeping with the celebration theme, the cakes I made were colorful, joyful and reflect the colors of the main flavoring ingredients (champagne and strawberries) which were also use to flavor the decadent butter cream cake frosting.

So to make the cake you will need to do the following:

For the cake (4 x 13 cm pan or 5 inches)
  • 2 large eggs, room temperature
  • 200 g sugar
  • 200 g sifted flour
  • 90 g melted butter
  • Tsp and a half of baking powder
  •  A dash of salt
  • 70 g of strawberry and champagne syrup (recipe follows)
  • 1 tsp vanilla
Combine flour, salt and baking powder and set aside. Cream eggs and sugar, until they become a whitish fluffy batter, and when you drop some batter on the surface it will hold few seconds before sinking. Add the vanilla, then the butter and whisk again until well combined.

Turn off the mixer and with a spatula start combining the flour mixture. Add it in two batches. When combined add the syrup.

Pour the batter into 4 pans, pre-greased and lined with parchment or wax paper, or in 2 batches if you don´t have 4 pans of the same size. Keep the rest of the batter in the fridge while you bake the first batch.

If you want to color your batter just add a drop of food coloring, fill in the first pan, than add another drop of food coloring, and fill the second pan with batter and so on until you fill the four pans. This will you will have a difference in the color intensity or color gradients.

Bake in a preheated oven (180C) for about 20 minutes.

Let the cake cool for 5 min in the pan then remove and put on a cake wire to cool completely.

For the syrup:
  • 75 g strawberry puree
  • 75 g champagne
  • tbsp vanilla sugar or you can use half vanilla bean and a tbsp sugar
Combine all ingredients and let it simmer for about 10 min. When done, you can process it to get a smoother syrup.

For the butter cream you need:
  • 75 g water
  • 180 g sugar
  • 75 g egg whites, at room temperature
  • 270 g butter, at room temperature

Combine sugar and water, put it on medium high heat, at the same time start whisking the whites at medium speed. When the syrup reaches 120 C then it´s ready to be poured over the foamy and doubled in size egg whites. If you don´t have a thermometer, you need to watch when the syrup forms big and uniform bubbles on the surface, or if you are very courageous you can put your fingers in ice cold water, then dip it in the syrup quickly and then cool it back in the cold water. If the syrup ball forms threads when pulled apart then it's ready. I honestly recommend you make a small investment and buy a thermometer.

Slowly pour the syrup over the egg white, and increase the speed of the mixer, and keep whisking until the white is very creamy and shiny, when the sides of the bowl are rather warm start adding the butter piece by piece while the mixer is still on and on high speed, when the butter is well combined you can add a tsp of vanilla essence or 2 tsp of champagne!


cake assembling:

Brush each layer with the remaining syrup, then spread some of the butter cream on the first layer, add the second layer and repeat until you have all the layers. I also added freshly sliced strawberries between each layer.
Frost the cakes with an outer layer of butter cream. At this stage, chill the cake for 30 min in the fridge. Than add another layer of butter cream. Chill and then add the final layer. At this stage, you can play with the color shades and intensity, or you can decorate according to your desires and used geometric or free form motifs, the choice is yours.


I finished the decoration with macarons, that I had painted and filled with the same buttercream!

Though the cake was not the easiest one I made, in fact it was time consuming, but I can guarantee that it was absolutely worth the effort.

A big thank you for all the people who visited the blog, shared the recipes and tried some, so grateful, hope you keep on visiting and liking what I do!

Unfortunately the pics don´t show how cute the cake was, I took them late in the evening and was hard getting a good shot, but what was important that it tasted real good, and I hope you do try the recipe!

Monday, June 24, 2013

Orange and poppy seeds pancakes!

I was taught early on by my mother that breakfast is the most important meal of the day. To this day, I religiously follow her advice. Forget all the technical jargon nutritionists throw left and right, which most of the time I don't really understand, but I firmly believe if you start your day on a positive note you will most likely have a good and productive day.

I like to treat myself during the weekends with a more decadent breakfast. Pancakes, among others, are a favorite of mine, as they can be easily tweaked and modified so that you are never bored and feel as if you are trying something new every single time. Whoever invented pancakes, I salute you, you deserve my deepest gratitude!


For this pancake recipe, I used orange peel and poppy seeds as the main flavoring ingredients. Orange add a wonderful taste and fragrance whereas the poppy seeds add the crunch and more nutritious elements.


I topped the whole with strawberry sauce for a fresh, fruity and sweet touch. For me, it's the perfect way to start your day, especially on the weekend, or just any other if one has time.

For the pancakes you need (for 2 people):

  • 130 g flour
  •  20 g vanilla infused sugar (or just sugar)
  • 1/2 tsp baking powder
  • 1/2 tsp baking soda
  • dash of salt
  • 2 tsp orange zest
  • 1 tbsp poppy seeds
  • 1 egg (yolk and white separated)
  • 1/2 tsp vanilla essence
  • 160 g buttermilk
  • 25 g melted butter
Combine all the dry ingredients with the zest and seeds and mix well. Mix egg yolk, vanilla and buttermilk. Beat the egg white until soft peaks form (or you can just mix the whole egg with the buttermilk, but beating the egg white apart will give a great fluffy texture so it´s really worth it if you have time). Make a hole in the dry ingredients, add the buttermilk mixture then the butter and mix well, slowly fold the egg white, in 2 or 3 batches, when well combined, just let the batter rest for 10 minutes and bake it in a large skillet over medium heat.


Strawberry sauce:
  • 100 g finely diced strawberry
  • 20 g  sugar (vanilla flavored is better)
  • 3 tbsp orange juice
Combine all ingredients in a saucepan and let it slowly simmer on a low heat, after 10 min, the sauce will be ready. You can serve it chunky or blend it to have a smoother sauce. This time I wanted it smooth, even if I prefer the chunkier variety, but it's up to you to decide which suits you better.  

I served the pancakes with a strawberry sauce, but they really go well with raspberry or blueberry sauces or even dark or semi-sweet chocolate sauces. The choice is yours, after all it's your power breakfast and it has to be your way!


Saturday, June 22, 2013

Coco-choco cupcakes!

Dark, fudgy and sweet

The weather is still acting up here in Madrid, from a hot weekend to a cloudy and cold one. I haven´t had any vacation time for more than 6 months, and I still have to wait a bit. I am really longing for long days on the beach doing nothing and just enjoy everything that the seaside offers. So until then, I have to keep myself busy and indulge myself every now an then with a sweet treat, until I can finally escape the hectic city life.
We all know how uplifting chocolate can be, so I wanted to do a dessert with chocolate but flavored with an ingredient that denotes warmth, sandy beaches and vacation times, and what better than coconut to deliver just that.
The batter will make around 7 cupcakes

Of course, the recipe I developed is easy and relies on ingredients you are most likely to have in your pantry. To complement the cupcakes, the frosting was also a breeze to make.
The end result of my work: fugdy coco-choco cupcakes with a pronounced chocolate flavor that goes so well with the refreshing taste of coconuts. The perfect dessert after a long and hard day at work.

Now let´s see what you need for these cute and delicious cupcakes!
Baked and waiting to be frosted

For the batter you need: (makes 7)

  • 1 egg
  • 60 g  flour
  • 10 g cocoa powder
  • 70 g soft butter
  • 65 g vanilla sugar
  • 3 g baking powder
  • dash of salt
  • 30 g melted and cooled chocolate
  • 70 ml coconut milk
  • 3 to 4 tbsp shredded coconut and lightly toasted (if you wish more intense flavor)
  • tsp of coffee liquor (or just use vanilla essence)

Combine the dry ingredients and sift them. In a mixing bowl, cream the butter and sugar, once well combined add the egg with the liquor, mix till well blended. Add the chocolate and mix again, when all combined, turn off the mixer, add the flour and fold into the batter. Add the coconut then the coconut milk. 

Fill the cupcakes cases about half way, pop them in a preheated oven (180C) and bake for about 20 minutes. 

Chocolate and butter frosting:
  • 100 g condensed milk
  • 100 g soft butter
  • 20 to 40 g sifted cocoa powder (depends on how chocolaty you want the frosting)
  • 20 g coconut cream (it´s the cream you find when you open the can of the coconut milk)
Be generous with the frosting

This recipe has been used by my family for as long as I can remember using frosting on cakes and Christmas logs, it is so easy to make and delicious. You just need to combine the milk, butter and coconut and mix until well combined, start adding the cocoa powder, mix well until you have a fluffy mixture. Leave it in the fridge for about half an hour before using.
Decorate with few coconut shavings

Now you can frost your cooled cupcakes, I added freshly shaved coconut to decorate and add more flavor. Enjoy!
Enjoy these cupcakes in any weather and any time

Sunday, June 9, 2013

Cookies for New Born Babies!

For the last couple of weeks, I have been making lots and lots of cookies and decorating them using different ideas. For some reason, once you start decorating cookies, you will hardly be able to stop.

With so many themes, you will never run out of ideas to transform a humble cookie into a work of art. So let your imagination flow and delight your family and friends with special cookies.

I'm fairly a novice in cookie decoration as I started less than a year ago and I am still learning a lot about the techniques of cookie decoration. Although it's a time consuming activity, it's nevertheless very rewarding and I just love it.

Every now and then a friend or a family member welcomes a new born baby bringing a ray of sunshine into the lives of all those who encounter him/her. To celebrate such occasions, us grown-ups  indulge ourselves with sweet treats and cookies are becoming ever more popular in such occasions which inspired me to create these cookies.

To create the shapes you will see in the pictures below, I bought the cutter shaped like a baby onsie but I managed to create the baby shape and the bib using cutters I already have.

I used a sugar cookie dough recipe which takes time to master. Additionally, making the perfect royal icing is definitely not easy. Needless to say that piping and keeping your hand steady is a challenging task. I am not saying this to discourage you, but keep in mind that decorating cookies takes time and patience, lots of it.

Now, I will leave you with some of the pictures I took, the fruit of my hard labor.