Showing posts with label cherries. Show all posts

Sunday, July 1, 2018

Sixth Anniversary Celebrated with a Chocolate and Cherry Cake


Six years! Wow, it seems like yesterday that I started my food blogging journey and I couldn't be happier to celebrate with you my blog's sixth anniversary.

Food bloggers make everything seem effortless. However, behind every single post there's an enormous time invested into perfecting the recipe, styling the food, taking stellar photos, and writing the post among many other big and small steps. It has been a hectic year for me and I did not have enough time to blog as often as I wanted. This made me have a new respect for those who lead very busy lives and yet find the time to inspire us with their wonderful food recipes.

Busy as I am, I could not let this occasion pass unnoticed. The blog's anniversary is the perfect occasion to slow things down, make a wonderful cake and just savor the moment (and the cake of course!).

I am surely not the only one who is a die-hard fanatic of chocolate and fruit combos. For my blog's anniversary, I went for a cherry and chocolate cake and let me tell you that it was as delicious, scrumptious and divine as it can be.

The base of the cake is a simple chocolate sponge as I wanted the filling and the frosting to shine through unhindered. With ingredients like dark chocolate, mascarpone, amarena cherries or Italian sour cherries, you are one step away from perfection.

Although elaborate cakes are usually reserved for special occasions, no occasion is more special than treating yourself or your loved ones with a cake made with delectable ingredients and a whole lot of love!

There are a few steps to making the cake, but they are not complicated. You just need some planning ahead.

Let´s start with the sponge base.
For 4 layers you need (15 cm pan):
  • 4 eggs at room temperature
  • 120 g sugar
  • 90 g pastry flour
  • 30 g cocoa powder
  • 40 g melted butter
  • half tsp salt
  • 2 tbsp kirsch (cherry based brandy, or you can use any other cherry liqueur)
  • 1 tsp vanilla extract


First mix flour, cocoa powder and salt and set aside.

In a bowl, combine eggs, kirsch and vanilla and start beating on a low speed, then slowly increase the speed until the eggs become frothy. Start adding the sugar, and beat for at least 10 minutes or until the batter triples in volume, is pale in color and can hold shape.

Turn off the mixer, and gently fold the flour mixture. Once well combined add the butter and mix carefully.

Grease and line 4 pans. Divide the batter into the pans and bake in a preheated oven  (170 C) for 12 to 15 minutes.

Leave to cool for 5 to 10 minutes then remove from pans and set aside to cool completely, preferably on a wire rack. 

For the mascarpone filling:
  • 250 g mascarpone, at room temperature
  • 100 g soft butter
  • 100 to 150 g powder sugar (adjust to your liking)
  • 30 g amarena cherries syrup (if not available use any other cherry syrup)
Combine the cheese and butter and whisk until well incorporated, add the sugar and mix again, and finally add the syrup and mix for 30 seconds. Put in the fridge to harden. 

For the chocolate ganache:
  • 170 g dark chocolate, chopped
  • 140 g cream, 35%
  • 1 tbsp kirsch or vanilla extract
Heat the cream on a gentle flame and remove it before it boils. Pour over the chopped chocolate, and leave for a couple of minutes. Whisk until you get a smooth ganache. Add the kirsch and mix again.


For the chocolate frosting:
  • 250 g mascarpone at room temperature
  • 170 g of the previously prepared ganache 
  • 40 g powdered sugar
Combine all the ingredients and beat until well combined and fluffy. Refrigerate.


Now that all the elements are ready, it's time to assemble.

Dollop some of the filling on your serving plate and add the first cake layer. Spread  a generous amount of the mascarpone filling over the cake and then add amarena cherries cut in half. You can use fresh cherries if you don't have the amarena ones. Top with another layer cake and repeat the process until you the last cake layer.

With a spatula cover top and sides of the cake with what´s left of the mascarpone cream and refrigerate for half an hour.

Take the cake out of the fridge and cover it with the chocolate frosting. Leave some if you want to decorate with it. 
Once you covered the cake, and decorated it to your liking, add the remaining ganache. If it has set too hard, heat it over simmering water. Pour over the cake and let it drip over.

To add a nice touch, I piped some chocolate frosting around the edge of the cake. I topped the frosting with cherries. Voila, you're done!

What a light and rich cake! It has the perfect level of sweetness and marries beautifully the distinctive flavor of amaerna cherries and the deep notes of chocolate. Seriously, this is a cake you should try! 

Sunday, June 12, 2016

Zebra Berry Cheesecake!


Last week my friend asked me to bake something for her boyfriend´s birthday. We discussed all the options focusing on a cake with chocolate or one with fruits. Finally, we went for a cake featuring berries. This was a logical option now that the berry season started all over Spain and all sort of fresh berries are readily available. Moreover, I love the taste of berries in cakes and my friend couldn't agree more! 

Instead of a regular cake, like a sponge flavored with a filling of berries, I suggested to my friend to make cheesecake. A cold and creamy cheesecake would be perfect now that summer has officially arrived in Spain and Madrid is slowly heating up. 

I played around with my usual cheesecake recipe, and mixed 2 batters to create a beautiful layered or zebra look. The cake was such a hit that I decided  I deserved one just for myself. I did show some restrain and shared few pieces with my close friends. 


The recipe is simple, I baked it in a 15 cm springform pan to get a high result.  You can use an 18 cm pan or even a 23 one if you want a flatter cake. Always adjust the baking time when you change the size of pan that was used for the recipe. 

For this cheesecake you need:

The base:
  • 50 g caramel cookies and 50 g digestive cookies 
  • 20 g melted butter 
  • 1 tsp coconut sugar or brown sugar
To prepare the cookies place them in a zip-lock bag and pass a rolling pin over them as many times as you need until you end up with coarsely textured crumbs.  Add the melted butter, sugar  and  mix well. Place the cookie mixture in a springform pan that is greased and covered with parchment paper. Press the mixture to cover the bottom. You can create a rim at the edge of the pan if you want, though I didn't. Bake in a preheated oven (180 C) for 8 to 10 min.  Set aside and cool.


For the cheesecake mix:
  • 600 g cream cheese at room temperature
  • 3 large eggs at room temperature 
  • 120 g Greek yogurt (or thick yogurt, or sour cream)
  • 130 g sugar
  • 1 tbsp flour 
  • 25 g caramelized biscuits spread (Lotus Biscoff)
  • dash of salt
  • 1/2 tsp vanilla essence
  • 1/2 tsp cinnamon (or to your liking)
  • 1/2 tsp of kirsch (optional)
  • 3 to 5 tbsp of berry coulis (recipe follows)

In your mixer bowl, add the cheese and mix on a low speed with the paddle attachment for 2 to 3 minutes. Then add the sugar, the Biscoff spread, yogurt, cinnamon and flour and mix again until well blended and no lumps are visible. Add the eggs one by one and keep mixing on a low speed. Finally add the salt, kirsch and vanilla and mix a bit. 

Divide the batter in 2. To one batch, add the berry coulis but don´t add too much or else you will end up with a runny batter. 

To get the zebra effect, add 2 tablespoons of the white batter, then two of the berry batter  and so on. Ever so slightly tap the pan or shake it to flatten the batter.


Bake in a preheated oven (150 to 160 C). 

Usually it's customary to wrap the spring-form pan with aluminum foil and place it in another pan filled with warm water and then bake for the required time that is usually for a pan of this size one hour to one hour and a half (oven-dependent).  This bain-marie method of cooking is needed to bake your cake at a gentler heat to avoid surface cracks.

What I do is different though. I put in the middle layer of the oven a pan and fill it with warm water then place the cheesecake pan over a cookie sheet and put both over the pan. This creates  a steamy environment in my oven and allows the cheesecake to cook all the way through while retaining a smooth creamy texture and most importantly with no surface cracks whatsoever.

After one hour, turn off your oven, shake the tray, make sure the middle is still a bit wiggly and leave the oven door cracked open for another half an hour to an hour. 

Let the cake cool completely before you put it in the fridge overnight. 


For the berry sauce or coulis:
  • 300 mixed berries (strawberries, raspberries, blueberries, cherries, blackberries and I also used cranberries)
  • 1 tbsp sugar
  • half vanilla pod or 1 tsp of vanilla extract
Combine all ingredients in a saucepan and let them simmer for few minutes over a flame until the fruits are soft. Mash them well then and pass them through a sieve to get rid of the seeds.

You will have sauce than the cake requires. Use the remaining sauce to cover the top of the cheesecake and decorate as you  wish! 

Now you´re ready to taste a luscious and creamy dessert with the amazing tangy addition of the berries! Everybody will love it, I can guarantee it! 
Check my other cheesecake recipes here and here

Friday, July 31, 2015

A Jazzed Up Cherry Compote!


In my last post I have mentioned that I will be posting some recipes featuring cherries as a main ingredient. As the season of these amazing summer fruits is coming to an end, there are many ways to preserve them while at their peak of freshness and quality.  You can of course make jam out of cherries and it will taste wonderful but this time I thought of preserving them as compote. This option is slightly different from jam as you won't need to chop or process the cherries, however, you may pit the fruits or leave them whole.


Cherry jam made only with cherries has a wonderful taste on its own but I do find it needs a booster and what better way than to add some citrus fresh for added freshness and taste? I do believe that lemon, lime and orange (or any citrus for that matter)  add so much flavor to both sweet and savory recipes even when used sparingly.

This compote recipe is really quite simple but perhaps the only problem with it is the cherry pitting. It does take time and you better wear gloves if you don't want your hands to stain! However, the end result is really worth it! I have made several batches of this compote, and I think I will keep on making it until the cherry season is over. It is really that good!


For 2 small jars or a big one,  you will need:
  • 350 g pitted cherries
  • 180 sugar
  • 1 lemon and 2 orange peels (a small slice of each fruit is enough, remember you only need the zest)
  • 1/4 tsp of pectine (optional, it thickens and helps in the setting of the compote)
  •  1 tsp lemon juice and 2 tsp orange juice
Combine everything in a heavy bottom sauce pan, mix well then leave to simmer over a gentle heat for about 30 min. When done, the cherries are tender but still holding their shape. If you overcook them, the fruits will disintegrate and you don't want that in a compote.
Transfer to sterilized jars and close. Once cooled transfer to the fridge. If you want to preserve them out of the fridge, you need to sterilize the filled jars again. However, once opened, it's better to put them in the fridge. I usually don't bother with this process as I only make small batches.


Enjoy them over your pancakes, over a toast and some butter, as a filling for a cake, over baked brie or camembert, really, the choices are endless.


I will share with you soon an easy recipe using this extremely delicious compote, stay tuned!

Sunday, July 19, 2015

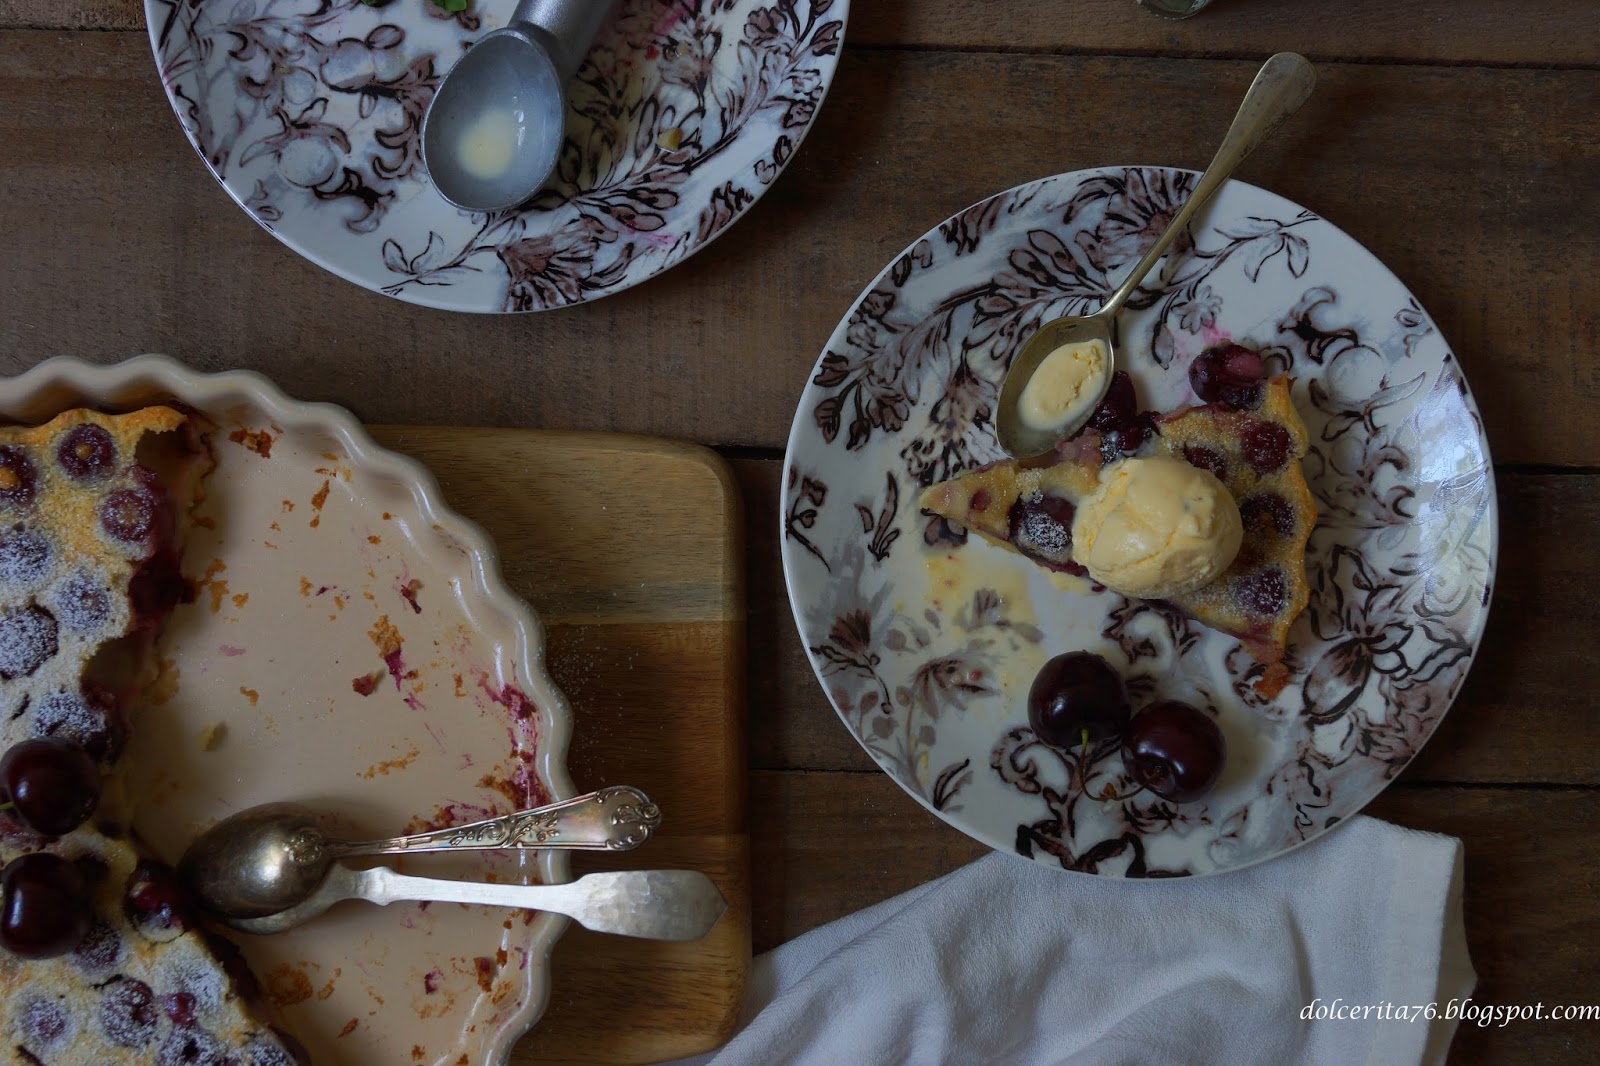
Cherry Clafoutis, a summer classic.

Summer is an amazing season and although I´m not a fan of hot weather, however there are so many beautiful things to do and to enjoy during this season that make up for this annoying detail.

Any visit to the market during summer-time will greet you with a bounty of wonderful fresh fruits; a feast for the senses! As the season progresses different fruits and fruit varieties start to make their way to the market. By late spring and well into summer, fresh cherries can be easily found in Madrid markets. Cherries not only look good and taste great but they are also highly nutritious. With so many cherry varieties from sweet to sour, there's a cherry variety to just about any taste. 

I love all fruits, well almost, but cherries are one of my favorites and hold a special place in my heart. When I was still a kid, I used to pick them fresh from my uncle's orchard which was teeming with cherries, apricots and apples. Anyone who tasted super fresh fruits picked from trees knows that it is quite unrivaled, and until this day I don´t think I have tasted something as delicious as those cherries.

Nevertheless, the Jerte Valley of Spain is very popular for its cherries that are well appreciated and can be found in almost all markets. To make good use of this super fruit in its season and peak of freshness I decided to use it in several recipes starting with a classic: the cherry clafoutis.


Like many great classics, cherry clafoutis is a French dessert that is surprisingly easy to make and can be simply tweaked to meet your taste. The recipe has two main parts, the base and the fruit. The base is very simple and pretty similar to the crêpe batter. Once prepared it is poured over the fruits and the whole thing baked in the oven.

I should note that traditionally the recipe keeps the cherries whole, but I like them pitted. It's really up to you to pit the cherries or not. In case you don't want to pit them, do warn your guests!


For a 22 cm tart pan you need:
  • 2 large eggs
  • 70 g sugar
  • 30 g melted butter
  • 30 g ground almonds
  • 75 g flour
  • 125 ml milk plus 125 ml of cream
  • 350 g  pitted cherries
  • 1 tsp of kirch (optional) and a 1/2 tsp of vanilla extract or 1 tsp vanilla sugar
  • dash of salt

First whisk the eggs with the sugar, the kirsh and the vanilla then add the melted butter and whisk again. Fold in the almonds, the flour and the salt. Slowly add the milk and cream while mixing to avoid having  any lumps.
Once you have a smooth batter you just need to pour it over the cherries that you have arranged in the generously buttered tart pan.


Bake for about 10 min at 200C then lower the temperature to 180C and bake for an additional 15 to 20 min.
You need to watch the clafoutis and take it out of the oven when it´s golden brown and still a bit soft in the middle. 

Serve it warm with some vanilla ice cream and a light dusting of powdered sugar. It´s also delicious when it´s cold, but I like to heat for 10 sec in the microwave before enjoying the leftovers!

Enjoy this wonderful classic dessert with its authentic and refreshing taste of summer!

Tuesday, June 23, 2015

A creamy Pavlova with summer fruits.


In my last post I made a sumptuously creamy creme brulée which left me with lots of egg whites! This isn't really a problem as egg whites are extremely versatile, but whenever I have a large batch of whites I almost always like to make a meringue-based recipe. The end result is a recipe that can always be tweaked to suit individual taste. Having this in mind, perhaps the best way to make use of these egg whites is to prepare a delicious Pavlova.

Making a Pavlova seems complicated, but in reality, if you know how to make a meringue, you know how to make a Pavlova. Moreover, a Pavlova is really a fun recipe. With the same base you can create endless combinations of cream and fruit toppings. This time, the creamy layer I opted for is made from mascarpone cheese sweetened with maple syrup. Add some fresh fruits and you have a summary and gluten free dessert. Replace the mascarpone or whipped cream with vegetarian whipped cream and you will have a gluten and lactose free recipe. 


So let's get started.

For 5 mini pavlovas (10cm), you need:
  • 90 g egg whites at room temperature
  • 150 g super fine white sugar
  • few drops of lemon juice and 1/2 tsp of white vinegar
  • 1 tsp of cornflour 
  • the beans of one vanilla pod
  • dash of salt.

First start whipping the egg whites at low speed with the salt, lemon, vanilla and vinegar, increase the speed slowly, when the whites are frothy start adding the sugar one tablespoon at a time. Keep beating until the sugar has dissolved and you have a stiff and shiny meringue!

Now scatter the corn flour over the meringue and with a spatula gently incorporate to the batter. You can pass the flour through a sieve to make sure the flour won't create lumps in the meringue.

Cover a baking sheet with baking paper to be ready to form the mini pavlovas. Some like to delimit with a pencil a circle on the back of the baking paper as a guide when forming the cakes and this what I usually do to get a perfect circle. 

Spoon just enough meringue over the baking sheet to make a nice serving size and then flatten with a spatula but do make sure that the edges are higher so as to have a central depression which you can fill with the cream and fruits after the meringue is baked. Alternatively, you can use a pipping bag to form more elegant and uniform meringues but just make sure to pipe more meringue over the edges to elevate them in comparison to the center.

Bake the pavlovas in a preheated over (between 100 and 120C) for at least an hour. They will be ready when they are firm to touch and they can be detached easily from the baking paper. Leave them to cool off completely before using them.


For the mascarpone cream, you need:
  • 200 g mascarpone (at room temperature)
  • a tbsp spoon of maple syrup (just enough to sweeten the cheese, remember the pavlovas are really sweet)
  • use any king of fruits you like for topping, I used strawberries and cherries
  • grated dark chocolate

I added some balsamic vinegar to the strawberries, but you can use them as they are. Mix the cheese with the maple and spoon over  the baked meringue. Finally, add the fruits and the chocolate and you are ready to enjoy a delicate, creamy, light and delicious dessert!