Friday, July 31, 2015

A Jazzed Up Cherry Compote!


In my last post I have mentioned that I will be posting some recipes featuring cherries as a main ingredient. As the season of these amazing summer fruits is coming to an end, there are many ways to preserve them while at their peak of freshness and quality.  You can of course make jam out of cherries and it will taste wonderful but this time I thought of preserving them as compote. This option is slightly different from jam as you won't need to chop or process the cherries, however, you may pit the fruits or leave them whole.


Cherry jam made only with cherries has a wonderful taste on its own but I do find it needs a booster and what better way than to add some citrus fresh for added freshness and taste? I do believe that lemon, lime and orange (or any citrus for that matter)  add so much flavor to both sweet and savory recipes even when used sparingly.

This compote recipe is really quite simple but perhaps the only problem with it is the cherry pitting. It does take time and you better wear gloves if you don't want your hands to stain! However, the end result is really worth it! I have made several batches of this compote, and I think I will keep on making it until the cherry season is over. It is really that good!


For 2 small jars or a big one,  you will need:
  • 350 g pitted cherries
  • 180 sugar
  • 1 lemon and 2 orange peels (a small slice of each fruit is enough, remember you only need the zest)
  • 1/4 tsp of pectine (optional, it thickens and helps in the setting of the compote)
  •  1 tsp lemon juice and 2 tsp orange juice
Combine everything in a heavy bottom sauce pan, mix well then leave to simmer over a gentle heat for about 30 min. When done, the cherries are tender but still holding their shape. If you overcook them, the fruits will disintegrate and you don't want that in a compote.
Transfer to sterilized jars and close. Once cooled transfer to the fridge. If you want to preserve them out of the fridge, you need to sterilize the filled jars again. However, once opened, it's better to put them in the fridge. I usually don't bother with this process as I only make small batches.


Enjoy them over your pancakes, over a toast and some butter, as a filling for a cake, over baked brie or camembert, really, the choices are endless.


I will share with you soon an easy recipe using this extremely delicious compote, stay tuned!

Sunday, July 19, 2015

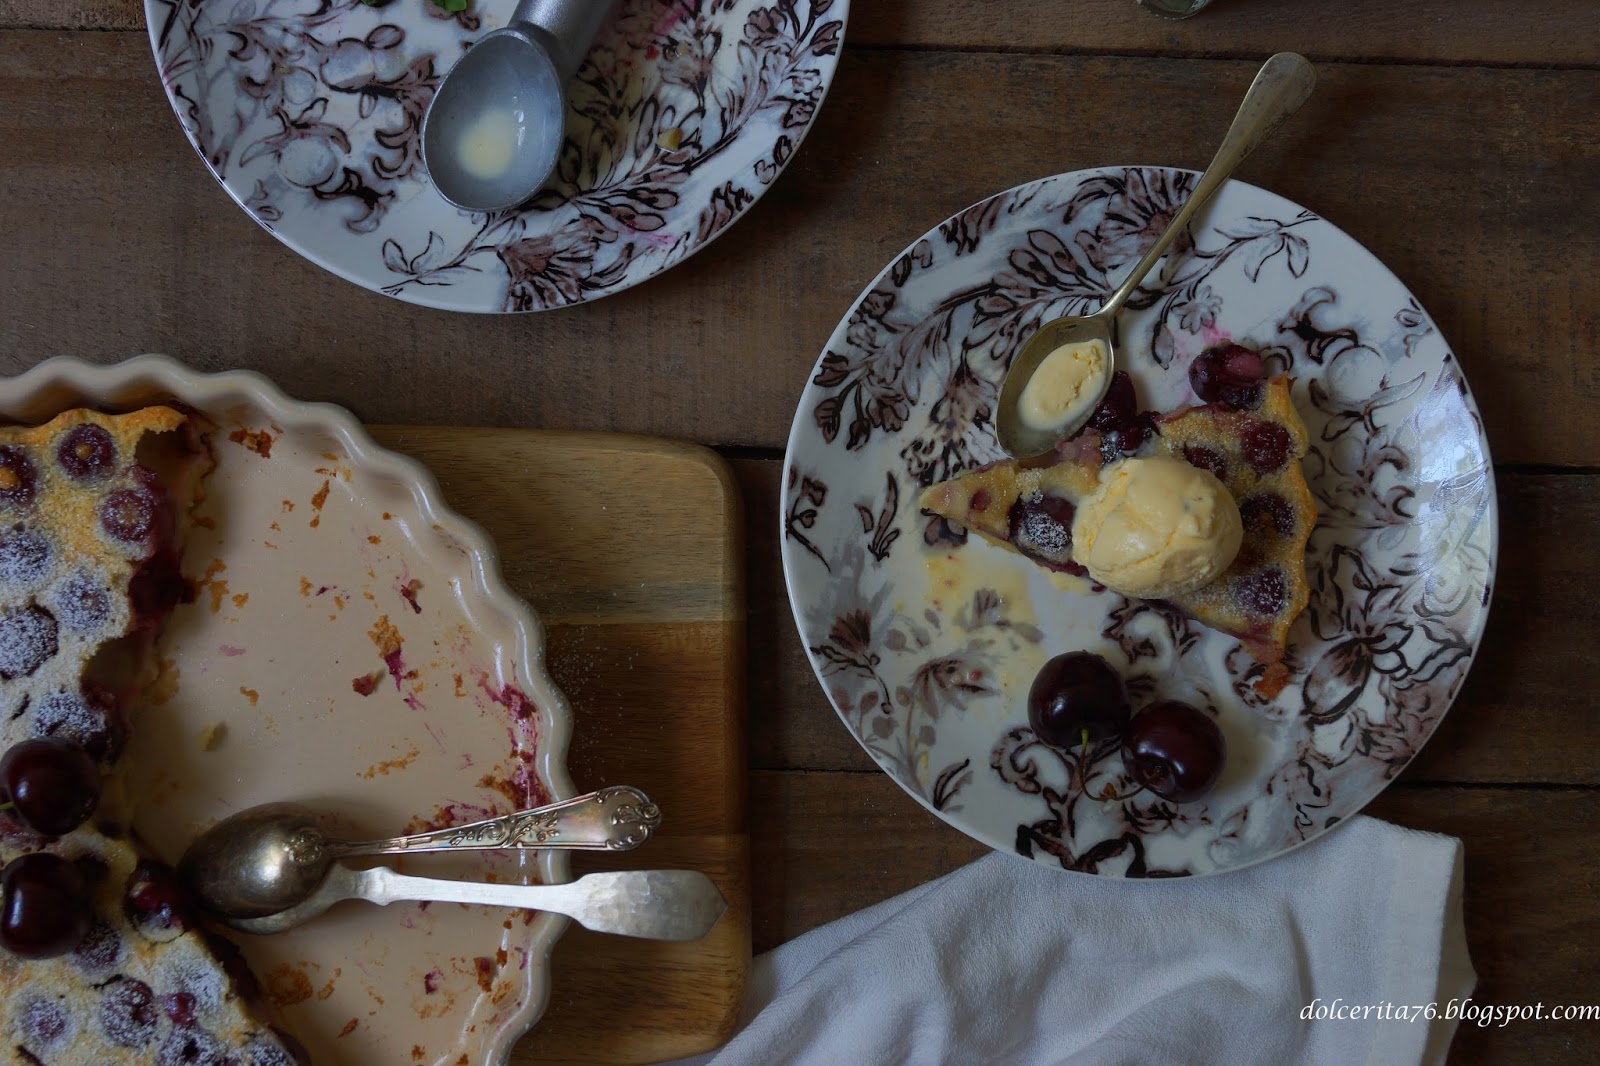
Cherry Clafoutis, a summer classic.

Summer is an amazing season and although I´m not a fan of hot weather, however there are so many beautiful things to do and to enjoy during this season that make up for this annoying detail.

Any visit to the market during summer-time will greet you with a bounty of wonderful fresh fruits; a feast for the senses! As the season progresses different fruits and fruit varieties start to make their way to the market. By late spring and well into summer, fresh cherries can be easily found in Madrid markets. Cherries not only look good and taste great but they are also highly nutritious. With so many cherry varieties from sweet to sour, there's a cherry variety to just about any taste. 

I love all fruits, well almost, but cherries are one of my favorites and hold a special place in my heart. When I was still a kid, I used to pick them fresh from my uncle's orchard which was teeming with cherries, apricots and apples. Anyone who tasted super fresh fruits picked from trees knows that it is quite unrivaled, and until this day I don´t think I have tasted something as delicious as those cherries.

Nevertheless, the Jerte Valley of Spain is very popular for its cherries that are well appreciated and can be found in almost all markets. To make good use of this super fruit in its season and peak of freshness I decided to use it in several recipes starting with a classic: the cherry clafoutis.


Like many great classics, cherry clafoutis is a French dessert that is surprisingly easy to make and can be simply tweaked to meet your taste. The recipe has two main parts, the base and the fruit. The base is very simple and pretty similar to the crêpe batter. Once prepared it is poured over the fruits and the whole thing baked in the oven.

I should note that traditionally the recipe keeps the cherries whole, but I like them pitted. It's really up to you to pit the cherries or not. In case you don't want to pit them, do warn your guests!


For a 22 cm tart pan you need:
  • 2 large eggs
  • 70 g sugar
  • 30 g melted butter
  • 30 g ground almonds
  • 75 g flour
  • 125 ml milk plus 125 ml of cream
  • 350 g  pitted cherries
  • 1 tsp of kirch (optional) and a 1/2 tsp of vanilla extract or 1 tsp vanilla sugar
  • dash of salt

First whisk the eggs with the sugar, the kirsh and the vanilla then add the melted butter and whisk again. Fold in the almonds, the flour and the salt. Slowly add the milk and cream while mixing to avoid having  any lumps.
Once you have a smooth batter you just need to pour it over the cherries that you have arranged in the generously buttered tart pan.


Bake for about 10 min at 200C then lower the temperature to 180C and bake for an additional 15 to 20 min.
You need to watch the clafoutis and take it out of the oven when it´s golden brown and still a bit soft in the middle. 

Serve it warm with some vanilla ice cream and a light dusting of powdered sugar. It´s also delicious when it´s cold, but I like to heat for 10 sec in the microwave before enjoying the leftovers!

Enjoy this wonderful classic dessert with its authentic and refreshing taste of summer!

Thursday, July 9, 2015

Watermelon and Salmon in a Refreshing Summer Salad.


I have been living in Spain for over a decade now, and I can truly understand why it is one of the world's top touristic destinations. The weather, the amazing nature, the rich history, the beautiful cities, the breathtaking beaches and of course the world class cuisine draw people form across the globe to try to the Spanish way of life.

If you had the chance to visit Spain so you must be familiar with tapas. A tapa is a small food portion that can range from just some olives to sophisticated meals and salads. In many places tapas are served for free with a drink, you can also find restaurants were only tapas are served.

Last year, in a hot summer day like the ones we're having this year, and in one of my favorite restaurants in the center of Madrid I tried a deliciously refreshing salad. It had a weird combination of ingredients but it was extremely delicious and perfect for hot summer days which often get too hot in Madrid.

I remembered this salad recently as  the Foodies plus, a Google plus community, suggested a Spanish Tapas month. I thought this salad would be the perfect recipe, since it could be served as tapas, as a first course or even a light main course. In all cases, this salad will surely please those who like to venture and try new flavor combinations; however, anyone should try it as it's easy to make and delicious.


For 4 persons, you need:
  • 150 g watermelon cut into cubes
  • 100 g smoked salmon, cut into small strips
  • 1 avocado cut into cubes
  • 1 tsp mustard
  • the juice of one big lemon or 2 small ones
  • salt and pepper to taste
  • 1 tsp chopped dill
  • black salt (optional) for decoration and olive oil
You just need to mix everything in a bowl, then arrange a small portion in a plate, add few drops of olive oil, decorate to your liking and enjoy with a cold beer or chilled white wine!

Tuesday, June 30, 2015

Ricotta, Lemon and Rosemary Cake; Three Years and Counting!


Another year has gone by and my blogging adventure now turns three. It´s impressive how time flies by, but it's even more impressive how I learned from sharing recipes with like-minded foodies myself, trying their recipes and taking note of their tips and advices.

I started thinking about a cake for this occasion a while ago. I had many ideas on my mind, but I finally went with an inspiration I had during my visit to Rome back in Easter. It wasn't my first time in this enchanting city, but as usual, it still managed to amaze me especially when I ventured out of the usual touristic hotspots.

It's needless to say what a festival for the sight and the palate Italy can be. I have been always a huge fan of Italian cuisine with all it has to offer! When I was in Rome I couldn't have enough of the usual Italian delicacies, but most importantly, I couldn't have enough gelato. Check with the locals for the best gelaterias and do pay at least one a visit. You will have a really hard time deciding which flavors to pick as there are so many on offer! My cousin recommended a gelateria located behind the famous Piazza Navona not too far from the St. Angelo bridge. As usual, the flavors on offer were just too many to sample in one visit, so I picked three scoops, one of which had yogurt, honey, rosemary and lemons. This combination just worked and I immediately knew I had to make something featuring these flavors all together. 


Therefore, for my blog's third year anniversary, I decided to use this Italian flavor combination in the celebration cake. Now, as usual I like to tweak things based on what I see works best but sometimes based on more mundane issues. Since I had three packets of ricotta in the fridge I decided to substitute the yogurt with ricotta which is after all a quintessentially Italian ingredient. Ricotta like yogurt does wonders in cakes, affecting both the flavor by making it richer and creamier and the texture by making lighter and  moist. Do try to incorporate ricotta in your baking and I am sure you will use it again and again. You can even make ricotta at home, I hope I will share with you this particular how-to soon.


Now, enough talking and let´s start baking.
For the cake you need: (3x15 cm cake pan)
  • 4 eggs, separated and at room temperature
  • 240 g cake flour
  • 200 g fresh ricotta
  • 100 g soft butter
  • 110 g white sugar
  • 110 honey (I used rosemary honey)
  • 1 or 2 tbsp of lemon zest (adjust to your taste)
  • 1 or 2 tbsp of finely chopped rosemary (again adjust to your taste)
  • 1 tsp of baking soda
  • 1/2 tsp of salt
  • 20 ml of lemon juice (4 tsp)
First combine the flour, salt and baking soda and sift.

In a mixing bowl, combine butter, sugar, honey, lemon zest and rosemary, and beat until creamy and well combined. Add the ricotta and beat again until combined, then the egg yolks and again you need to whisk! To that mix, fold in the flour mixture with a spatula and then add the lemon juice.

Add a dash of salt and few drops of lemon juice to the egg whites and beat them till stiff peaks are formed.

Fold the egg whites with the ricotta mixture gently so you don't lose all the air from the whites.

Once everything is well combined, divide the batter into 3 pans, previously greased and covered with parchment paper, and bake between 25 to 30 min in a preheated oven (170C). I usually check on my cakes after 20-22 min, by inserting a skewer in the middle of the cake, if it comes clean then it's time to take the cake out of the oven, if not, leave it for few more minutes.
If you don´t want to use three 15 cm in diameter pans, you can use two ones of 20 cm in diameter. 

Let the cakes rest in the pan for 5 min, then let them cool down completely on a cooling rack.

For the frosting you will need:
  • 200 g soft butter
  • 200 g powdered sugar
  • 80 g cream cheese or ricotta
  • 1 tsp lemon zest
  • 1 tsp lemon juice
Combine all ingredients but the lemon juice, beat until creamy and almost white in color. Add the lemon juice and beat again until combined.


Now the assembling is up to you. I opted for a naked cake i.e. a cake that's not completely frosted. I put a really generous layer of filling between the stacked cakes and then did a thin crumb coat to the outer edges covering only parts of the cakes and keeping the rest mostly visible.
In keeping with the Italian, and specifically Roman, theme of the cake, I decorated with a few branches of rosemary assembled to look like a Roman crown.

This cake is beyond delicious. It fits the bill on some many levels. It is rich, lemony, creamy, crumbly and refreshing; it does  have it all!

Tuesday, June 23, 2015

A creamy Pavlova with summer fruits.


In my last post I made a sumptuously creamy creme brulée which left me with lots of egg whites! This isn't really a problem as egg whites are extremely versatile, but whenever I have a large batch of whites I almost always like to make a meringue-based recipe. The end result is a recipe that can always be tweaked to suit individual taste. Having this in mind, perhaps the best way to make use of these egg whites is to prepare a delicious Pavlova.

Making a Pavlova seems complicated, but in reality, if you know how to make a meringue, you know how to make a Pavlova. Moreover, a Pavlova is really a fun recipe. With the same base you can create endless combinations of cream and fruit toppings. This time, the creamy layer I opted for is made from mascarpone cheese sweetened with maple syrup. Add some fresh fruits and you have a summary and gluten free dessert. Replace the mascarpone or whipped cream with vegetarian whipped cream and you will have a gluten and lactose free recipe. 


So let's get started.

For 5 mini pavlovas (10cm), you need:
  • 90 g egg whites at room temperature
  • 150 g super fine white sugar
  • few drops of lemon juice and 1/2 tsp of white vinegar
  • 1 tsp of cornflour 
  • the beans of one vanilla pod
  • dash of salt.

First start whipping the egg whites at low speed with the salt, lemon, vanilla and vinegar, increase the speed slowly, when the whites are frothy start adding the sugar one tablespoon at a time. Keep beating until the sugar has dissolved and you have a stiff and shiny meringue!

Now scatter the corn flour over the meringue and with a spatula gently incorporate to the batter. You can pass the flour through a sieve to make sure the flour won't create lumps in the meringue.

Cover a baking sheet with baking paper to be ready to form the mini pavlovas. Some like to delimit with a pencil a circle on the back of the baking paper as a guide when forming the cakes and this what I usually do to get a perfect circle. 

Spoon just enough meringue over the baking sheet to make a nice serving size and then flatten with a spatula but do make sure that the edges are higher so as to have a central depression which you can fill with the cream and fruits after the meringue is baked. Alternatively, you can use a pipping bag to form more elegant and uniform meringues but just make sure to pipe more meringue over the edges to elevate them in comparison to the center.

Bake the pavlovas in a preheated over (between 100 and 120C) for at least an hour. They will be ready when they are firm to touch and they can be detached easily from the baking paper. Leave them to cool off completely before using them.


For the mascarpone cream, you need:
  • 200 g mascarpone (at room temperature)
  • a tbsp spoon of maple syrup (just enough to sweeten the cheese, remember the pavlovas are really sweet)
  • use any king of fruits you like for topping, I used strawberries and cherries
  • grated dark chocolate

I added some balsamic vinegar to the strawberries, but you can use them as they are. Mix the cheese with the maple and spoon over  the baked meringue. Finally, add the fruits and the chocolate and you are ready to enjoy a delicate, creamy, light and delicious dessert!

Sunday, June 14, 2015

Coffee and Cardamom Crème Brûlée


I am one of those people whose day cannot really start unless I drink a big cup of coffee. It´s a routine that I stick by no matter what, it's almost like a sacred act. Definitely making coffee and sitting quietly to sip it is on of my favorite moments of the day.

While drinking coffee is the most common way with which people appreciate this aromatic bean, coffee can and is used in so many sweet recipes and even in savory ones!

In baking, coffee adds a really unique, deep, complex and aromatic flavor that cannot be substituted by any other ingredient. Adding coffee to your recipes will definitely create a wow factor, of course if used properly.

Given how delicious coffee can make a recipe, I like to feature it from time to time in my recipes like I did in the extremely delicious coffee and hazelnut cake. I think it´s time for another sweet treat with coffee as the hero ingredient.


Cardamom is a spice I often use in my cooking and baking. It has a very deep, complex and somewhat citrusy flavor. I like to use it alone, but quite often in combination with other aromatic spices or ingredients. While the pairing of coffee and cardamom might seem strange to some, it is indeed quite a popular pairing in the Middle East and other parts of the world where cardamom pods are ground with coffee to add more complexity to the coffee brew.

These two intense aromatic ingredients always bring back childhood memories even though at that time I didn't drink coffee. However, I remember how delighted I was whenever the wafts released from roasting coffee reached my delicate nose especially if cardamom was added to the mix.

One of the best ways to enjoy this culinary duo is in a crème brûlée, the much beloved classic!


My take on this classic dessert will surely please as it adds a delightful twist to the traditional version we are used to.

To make 3 servings you need:
  • 3 egg yolks; the ones I used weighed 52 g (note, do freeze the eggs whites if you can't find a way to use them immediately)
  • 1 1/2 tsp of ground coffee (use the kind that you prefer; instant or freshly ground)
  • 3 pods of cardamom (slightly break it to open up the pod)
  • 35 g sugar
  • 250 ml of cream (half of 35% and half of 18%)
Combine the cream with the coffee and cardamom pods. Gently heat, and let it simmer, for about 5 min. You will start smelling the cardamom and coffee after a few minutes of heating.
While the cream is heating, mix together the yolks with the sugar. You need to whisk until you get a creamy and pale mixture.
Slowly start adding the hot cream over the egg yolks while you keep whisking vigorously. 


Pour the cream, through a sieve, into the crème brûlée ramekins and arrange them over a tray. Preheat the oven at 150 degrees C (around 300 F).
Put the tray in the oven and add enough hot water to it to cover half or two thirds of the ramekins. Be careful not to spill water into the cream.

Bake the cream for about 40 min in the preheated oven. Do check on them from time to time. Gently shake one of the ramekins and if there's a slight wobble in the center it's time to take them out from the oven. Remember that the cream will continue to cook for a while after you take it out of the oven so you don't want to leave to set completely while in the oven. In addition, you need to keep in mind that the baking time will differ depending on the ramekins you used, the oven, the quantity of cream you pour into each pot and even the tray on top of which you have put the ramekins. I used a ceramic tray so if you are using a metallic one you might need to consider this factor as these trays heat differently. In all cases, check your pots after 25 min to be on the safe side.

Once the cream pots have cooled down, put them in the fridge for at least four hours or overnight.

When you are ready to serve, sprinkle a thin layer of light brown sugar over the cream, and with the help of a torch or under the grill of your oven, caramelize the sugar and serve immediately! Bon appetit!

Here you can try another recipe for crème brûlée I made last year 

Sunday, May 31, 2015

Lemon and Thyme Shortbread Cookies.


I like neighborhood shops, of all kinds. They are more friendly and have this extra human interaction that you just don't get in large supermarkets. Down in my building, there's a shop that saw many businesses come and go in the past few years. Last winter, I couldn't be happier to see that this place is now a flower shop. As I go to work and come back home I am greeted with various beautiful shapes and colors and not to mention the familiar and exotic scents.
I often stop by to check out the latest arrivals and last week a small plant with the cutest small purple flowers caught my attention. It was a thyme plant with a fantastic aroma; I bought it immediately.


As I got home I started thinking of the many recipes that one could make with thyme. I went with one that would also feature the fresh lemons that I got from Valencia and it is this recipe that I am sharing with you. Both lemons and thyme capture the essence of Mediterranean summers and having both ingredients in one recipe is just what I needed to cope with the hot days Madrid has been experiencing lately. There are many recipes of shortbread out there and almost all are pretty easy and straightforward. Like many basic doughs, shortbread dough is flexible enough and can absorb as many flavors as your heart desires and this is what I did with the lemons and thyme I had!


To make around 8 to 10 round shortbread cookies flavored with thyme and lemon you need:
  • 120 g white flour
  • 25 g potato flour (you can use rice flour or cornflour instead)
  • 50 g sugar
  • 100 g butter (room temperature)
  • zest of a small lemon
  • 1/2 to 1 tsp of chopped thyme leaves
  • dash of salt
Cream the butter with the sugar. When well combined, add the lemon zest, the thyme, the salt and mix again. Finally add the flour and mix well with the butter mixture. 
Wrap the dough in plastic and leave it in the fridge for at least an hour or overnight as I did.
You can shape the cookies as you like. What I did is to flatten the dough until about 1 cm thick and then used a 6 cm round cutter to cut out the dough.


After shaping you need to refrigerate the cookies for half an hour. Bake the cookies in a preheated oven (170 C) for 10 to 15 min. The baking time depends on the shape of the cookies and your oven. The rule of thumb is that you don't want to cook the shortbread for too long. You just need  the cookies to acquire a light golden color.

The cookies are delicious as they are, but if you want you can add a bit of lemon icing for an extra  touch. The icing is made by simply mixing some powdered sugar with lemon juice. You add just enough lemon juice to have the pouring consistency you like.

Decorate, serve and enjoy!


Wednesday, May 20, 2015

Ruffled Milk Pie, a Greek Classic!


I don´t know about you, but in most of my trips to the supermarket I end up forgetting what I came in for initially and instead buy stuffs that, let's say, were not really needed urgently.

So during my last supermarket adventure, I bought filo pastry because it was just there and I couldn´t resist! I also bought way too many blueberries and raspberries. When I left, I thought to myself, how on earth am I going to consume all of these fruits before they go bad or are no longer in their prime flavor and texture?


In my head I started jumping from one recipe to another in which I would use the fruits and the pastry together, and I finally landed on a pie I saw many years ago while watching a Martha Stewart show. The Galatopita, a typical Greek recipe, was prepared on the show  by Vefa Alexiadou and I loved how simple and beautiful the pie was.

I felt that the pie would lend itself beautifully to berries and so I decided to twist the original recipe a little by omitting the cinnamon and using the excess blueberries and raspberries I had. If you want to stick to the original recipe, by all means do, it is perfect as it is: sweet, crunchy, creamy and with a mild taste of cinnamon.


To make this pie, for an 18 cm pan you need:
  • 7 filo sheets
  • 50 g melted butter
  • 100 g of mixed berries: blueberries and raspberries
  • 130 g sugar
  • 2 eggs (about 100 g in total)
  • 100 ml milk and 100 ml of cream
  • 1 tsp vanilla extract
First you need to generously butter your pan. Then brush a filo dough with the melted butter and place some berries at the longest side of the sheet; I used 3 blueberries and 3 raspberries in each sheet. Roll the sheet to just cover the fruits then gather the rest of the sheet to create the ruffles.


Roll the ruffled sheet into a flower shape and place in the pan. As you work on one sheet of filo, make sure to cover the other sheets with a damp cloth or kitchen towel to prevent them from drying.


Once you have all your filo filled and rolled bake in a preheated oven (180C) for about 25 to
30 min or until the dough is golden brown.

Meanwhile, combine the milk and the cream and let them simmer on a low heat. In a bowl, whisk the eggs with the sugar and vanilla, slowly start adding the hot milk mixture. You need to temper the eggs before adding the rest of the milk and cream mix.

Add the custard mix over the filo and bake in the oven again for another 20 to 25 min or until you see that the mixture is set. If you feel the custard mix is in excess to what the pie needs, reserve the excess and cook separately.


Serve with a dust of powdered sugar and extra fruits. Enjoy the crunchiness of the filo on the top layer, then the tart and fragrant flavor of the fruits and the velvety smooth creaminess of the bottom layer.

What a wonderful Greek pie! I highly recommend you try it, especially if guests are coming over!

Thursday, May 7, 2015

A Gluten Free Chocolate Cake with a Spicy Twist!

It must be one of my favorite combinations: chocolate and salted caramel. Add to the chocolate chili, you will get an exquisite dessert that combines spicy, chocolaty, nutty and sweet flavors.

This cake is adapted from a Jamie Oliver´s recipe, it´s really easy to make and you can add your own twist to it. In my case I added chili, I just love how chocolate and the strong hot chili flavor combines to the perfection. I have used this combination before and for me it's a winning one. Here you can check my chili chocolate soufflé recipe, it´s really worth a try.


To make this cake you need few ingredients and a little effort.
For 4 to 6 portions you need:
  • 2 large eggs, separated
  • 100 g dark chocolate (I used a 72% variety)
  • 20 g sugar (if you don´t want to  add the caramel you might want to add more sugar)
  • 80 g ground almonds
  • 20 g butter
  • 1 tsp vanilla extract or vanilla paste
  • dash of salt
  • 1 chili finely chopped (use less if you can't handle the spice or more if you can!)

First melt the chocolate with the butter. I usually  melt them over a bain marie, but this time I used the microwave. The results are similar. In the microwave you need to carefully melt the chocolate in short bursts of 20 to 30 seconds at a time. Don't be tempted to leave the chocolate for a long time, as chocolate can burn really fast in the microwave if you are not careful. Ideally, put the mix of chocolate and butter for 30 seconds, remove it, stir and put it back again for another 30 seconds until the chocolate melts. Use shorter cycles once you see most of the chocolate pieces have started to melt. 
In a separate bowl, whisk the sugar the eggs yolks, until the mixture thickens and becomes pale yellow.
Add the salt to the egg whites and beat until you have stiff peaks.


Now combine the yolk mixture with the chocolate, add the vanilla, the chili and the almonds, Mix until well combined. Now add 1/3 of the egg whites and beat until you have a loose mixture, then gently fold the rest.
I used an 15 cm springform for the amount of batter, which I lined with a parchment paper and covered with baking spray.
Pour the batter into the pan and bake between 15 to 20 min in a preheated oven (175C). The longer cooking time will give you a more set and cakey cake whereas the shorter cooking time will give you a soft and gooey center! You choose depending on your preference.


If you want to serve it with salted caramel here is my recipe for a luscious caramel sauce.This cake is a must try if you love adventerous food combinations or if you are a fan of heat in your food!

Serve the cake with a dust of cocoa powder and coffee, or add the caramel on top of a vanilla ice cream scoop, and get one amazing dessert that will please everyone!


Saturday, April 18, 2015

Hazelnut Sugar Cookies with a Touch of Chocolate


I have this thing for cookies, any kind of them!. As you may have noticed I already posted many cookie recipes and will continue to do so as they are easy to make and can be adapted to suit just about any taste. 
I am also a huge fan of nuts and at any given time, there's bound to be at least 4 or 5 types of them in my kitchen. I consume them as snacks or put their wonderful taste and texture to use in sweet or even savory recipes.

A year ago, I made a hazelnut and coffee cake and it was an amazing combination. Since then I wanted to incorporate hazelnuts into another recipe and that's how this recipe came about.

These cookies have a very deep and rich nuts flavor which goes along so well with the little amount of chocolate that the recipe contains.Any serious fan of the buttery and complex flavors of nuts, especially hazelnuts, should try this recipe.

And here's how you make it.
For the cookie dough:
  • 160 g soft butter
  • 40 g hazelnut paste
  • 40 g lightly toasted ground hazelnut
  • 1 tsp vanilla paste or extract
  • 1 small egg at room temperature
  • 390 g all purpose white flour
  • 10 g cocoa powder
  • 120 g brown sugar
  • dash of salt

First, combine flour, cocoa powder, hazelnut and salt and set aside.
In a bowl and on a low speed, mix the butter, sugar and the hazelnut paste until combined. Add the egg and vanilla and mix for a couple of minutes.
Start adding the flour mixture and mix. When all the ingredients almost come together, flip the mixture over your working surface and gently mix until the dough comes together.


Wrap the dough in plastic film, flatten into  a 1 cm disk and refrigerate for at least 4 hours or overnight.

On a lightly floured surface, roll the dough to about 3 to 5 mm in thickness. Cut the shapes you want using a cutter or a sharp knife, just pay attention that if the dough becomes soft put it back in the fridge for about half an hour. The number of cookies you might get from this batch of dough depends on the size of  the cutter you use or the size of the shape you desire , but in any case you will get lots of cookies!

Place your cookies an a baking sheet covered with parchment paper, and put them it in the fridge for at least half an hour. Meanwhile, heat your oven to 180C. Put the cookies in the oven for about 10 min, till they are just cooked through but not over-cooked.

It might seem tedious to move the dough in and out of the fridge many times, but doing so is needed to ensure the cookies are flat with no bubbles and will keep their shape once baked.

This recipe works really well if you love decorating cookies and you want to try a new flavor. I decorated few of these cookies and I added hazelnut aroma to the royal icing to compliment the flavor of the cookies. You can see the result below.


I also dipped some of the cookies in melted chocolate (any kind you want) and sprinkled some chopped hazelnuts on top. Finally, I sandwiched some with my favorite chocolate spread and that is Nutella, of course!