Showing posts with label cookies. Show all posts

Wednesday, December 23, 2020

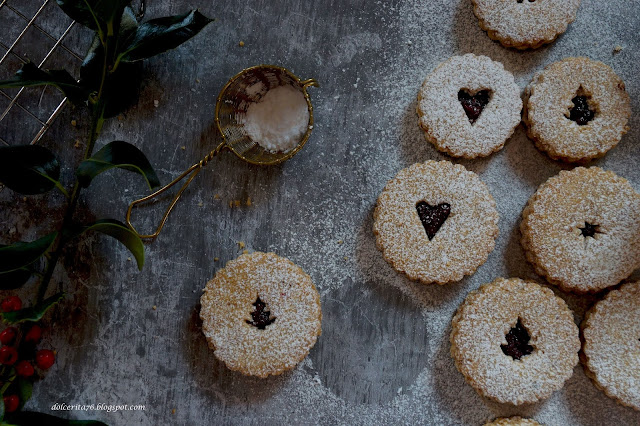
Linzer Cookies, a Rich and Fragrant Christmas Delicacy


A day or so separates from us from Christmas and it surely be one of the most unique Christmas days ever celebrated. For many, it will be spent in isolation or away from loved ones.  In times like these, I think it's best to maintain as much as possible the spirit of this holiday and enjoy it the best way we can. Luckily, there is no shortage of great classic sweets that will can surely lift our mood and spirits. A great example is Linzer cookies, a rich and fragrant treat best enjoyed during the holidays. Now, more than ever, we have the right need to indulge enjoy buttery rich, delicious and comforting baked goods. 

Traditionally these cookies are made from the same dough as Linzer torte. I often make and enjoy this dessert and I bake every now and then. From the Linzer torte to the cookies, you will need few adjustments to make the texture more crumbly and better suited for cookies. 

A short historic background of this recipe: Linz, a beautiful Danubian city, is considered the birth place of the Linzer torte (torte meaning cake in German). This cake is thought to be one the oldest cake recipes known in Europe, going back to 1696, but it seems that some historians found an older recipe from Verona dating back to 1653.


The Linzer torte is a rich cake, full of spices and enticing flavors, all topped with a sweet tangy raspberry jam. The use of spices in sweet recipes is quite common in many parts of Europe, especially in colder European countries. Spices are widely used in Middle-Eastern and Asian countries, but their use is widespread in savory dishes, which is not always the take in traditional European cuisine. It's always interesting to see how different cultures approach and use the same ingredient. Personally, I believe that using spices, especially in desserts, warms the body and uplifts the soul, something that is quite convenient in colder climates with long, dark and cold nights. In all cases, I love spices and welcome their use whenever possible.

For the dough you need (enough for 10 to 12 cookies):
  • 1 cup of toasted ground almonds, or hazelnuts (about 140 g)
  • 1 cup of flour (160 g)
  • 1/4 cup of powdered, granulated or even brown sugar (45 g), if you want the dough to be sweeter you can double the amount
  • 1/2 cup of cold butter (112 g)
  • Zest of half a lime or lemon
  • 1/4 tsp of cinnamon
  • 1/8 tsp of ground cloves
  • 1/8 tsp ground star anise
  • A dash of salt
  • 1 egg yolk
  • 1 tsp vanilla paste
  • Raspberry jam (recipe will follow).
In a food processor combine almonds and sugar, pulse until blended. Add the flour, the spices and the zest, pulse again until well mixed.

Now you can add the butter to the rest of the ingredients in the food processor and pulse until combined or put the mixture into a big bowl and incorporate the butter with the dry ingredients with your hands or a dough blender. When well mixed add the egg yolk and mix until you have a firm non sticky dough.
Wrap it in plastic and leave it in the fridge for about 3 to 4 hours (or even over night).


Take the dough out, and  on a floured surface roll it out for about a 4 or 5 mm thick, cut out the cookies and cut the Linzer eyes in half of them. Once done, put the cookies back to the fridge until firm.
Meanwhile, preheat the oven (160C) , then bake the cookies until the edges are golden brown (about 15 minutes).
Leave to cool completely on a wire rack 

For the jam I used:
  • 170 g raspberry (fresh or frozen)
  • 100 g of sugar (or 170 if you want it sweeter)
  • The seeds of a half vanilla bean
  • Squeeze of a lemon juice (just few drops). 
Combine all ingredients in a heavy bottom pan, when they start to boil and the raspberry starts falling apart, sieve the mixture (it is easier doing it at this stage) then put the jam back to the pan and leave it to simmer for about 20 or 30 minutes until it gets rather thick. 

Now all you need to do is to sandwich the cookies together with the raspberry jam, or any other jam that you prefer. Dust them with some powdered sugar and enjoy them with a cup of coffee or tea. 
 
The cookies are really delicate, crumbly and delicious. They make the perfect Christmas gift to your loved ones, or just gift them to yourselves because you too deserve all the love.
 
Finally, all that's left to say is Merry Christmas! 


Wednesday, May 11, 2016

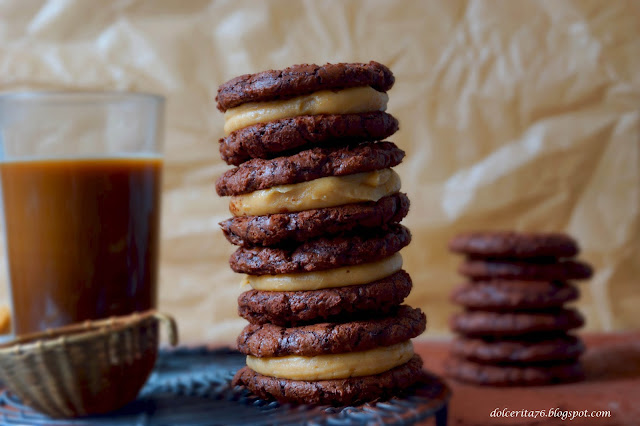
Brownie Cookies with Peanut Butter Filling


Last year's May could not have been any different from the current one. Last year, the weather was warm and towards the end of the month it become seriously hot. The thermometer jumped all the way up to 35 C. As for this year, it´s been raining like crazy. It didn't rain like that even at the height of winter. Though it may sound weird, but I actually enjoy such rainy and cold weather. It invites me to indulge in all sorts of comfort food and especially to bake luscious treats!

The recipe I´m sharing today is one I have been wanting to share for a long time now, but somehow I kept postponing it. With this rainy weather, I think it's the right time to do so. After all, what's better than a chocolaty treat on a rainy day?!


This brownie cookie recipe is inspired by one of Donna Hay's cookie recipes. She filled her brownie cookies with peanut butter and  I really liked the idea. However, I tweaked her recipe using my own version of brownies and filling.

The recipe is really easy and needs few ingredients. So let´s start baking!
For 14 to 15 small cookies you need:
  • 1 egg at room temperature
  • 100 g sugar
  • 1/2 tsp vanilla extract or coffee liqueur 
  • 110 dark chocolate (I used 74%)
  • 20 g butter
  • 1/2 tsp coffee powder
  • 20 g flour
  • 5 g cocoa powder
  • dash of salt
  • 1/8 tsp baking powder (about 1g)
First combine the chocolate and butter and melt in a microwave, or over a double boiler. If melting in a microwave, put them for 30 sec, then stir. Put for an additional 20 sec if not molten. Repeat until all of the chocolate and butter have melted. Finally add the coffee powder.

Combine all the dry ingredients but the sugar in a bowl and set aside.

In a bowl, whisk the egg, sugar and vanilla, until you get a creamy and pale mixture. On a low speed, add the chocolate mixture gradually. When well combined, fold in the flour mixture.


Place the brownie mix in the fridge for 20 min.

On a pan covered with parchment paper, scoop about one tbsp of the mixture (I used a small ice cream scoop) and drop on the pan. With a little pressure, lightly flatten the brownie ball a bit. Make sure to leave enough space between each one, as the cookies witll xpand during baking. Bake in a preheated oven (180 C) for about 8 to 10 min.

Remove the cookies from oven and let them cool for at least 10 min before taking them off the pan.


For the filling you need:
  • 75 g peanut butter
  • 25 g cream cheese (room temperature)
  • 50 g soft butter
  • 50 g powdered sugar
  • 1/2 tsp vanilla extract (optional)
Combine all the ingredients and beat until creamy and fluffy.

Now all you need is to fill the cookies and enjoy with coffee, milk or tea!

These cookies are slightly crunchy on the outside and with a soft and fudgy heart, all chocolate lovers will drool over them; I surely did!

Monday, January 25, 2016

The Ultimate Cinnamon and Caramel Cheesecake!


It's not a secret why cheesecakes are the ultimate desserts for so many people. They are creamy, sweet and can be varied quite substantially to meet just about any taste. I always enjoy a good cheesecake with a cup of coffee or by itself. When I am short on time I prepare the non-baked versions, even though I have a preference for the baked ones. However the last time I baked a good New York style cheesecake was when I shared this post. I think it´s about time I make a new one. 

The idea for this recipe has been on my mind for quite a while but I always managed to postpone it. The idea came to me while savoring the delicious caramel cookies also known as speculoos or speculaas. These biscuits, now popular worldwide, originate from Belgium and the Netherlands. Nowadays, one can find spread made from these cookies and I am a big fan! 


For this recipe I used both the cookies to make the base and the spread to flavor the cheese filling. The result is simply amazing and to make even more special, I decided to top the cheesecake with a special caramel sauce that complements the flavors found within the cake itself. 

And now let´s get baking!

For the base you need:
  • 100 g caramel cookies (I used the Lotus brand)
  • 20 g melted butter 
To prepare the cookies place them in a zip-lock bag and pass a rolling pin over them as many times as you need until you end up with a coarsely textured crumbs. Place the pulverized cookies in a  spring-form pan (18 cm) greased covered with parchment paper. Add the melted butter and  mix well then press the mixture to cover the bottom, you can add more cookies to form a rim on the sides of the pan, I didn´t this time. Bake in a preheated oven (180 C) for 8 to 10 min. Leave to cool.


For the cheesecake mix:
  • 600 g cream-cheese at room temperature
  • 3 large eggs at room temperature 
  • 100 g Greek yogurt (or thick yogurt, or sour cream)
  • 130 g sugar
  • 1 tbsp flour 
  • 100 g caramelized biscuits spread (Lotus Biscoff)
  • dash of salt
  • 1/2 tsp vanilla essence
  • 1/2 to 1 tsp cinnamon (to your liking)
In your mixer bowl, add the cheese and mix on a low speed with the paddle attachment for 2 to 3 minutes. Then add the sugar, the Biscoff spread, yogurt, cinnamon and flour and mix again until well blended and no lumps are visible. Add the eggs one by one and keep mixing on a low speed. Finally add the salt and vanilla and mix a bit. 


Pour the batter in the pan, and bake in a preheated oven (150 to 160 C). 

Usually it's customary to wrap the spring-form pan with aluminum foil and place it in another pan filled with warm water and then bake for the required time which is usually for a pan of this size one hour to one hour and a half (oven-dependent).  This bain-marie method of cooking is needed to bake your cake at a gentler heat to avoid surface cracks.


What I did is different though. I put in the middle layer of the oven a pan and filled it with warm water then placed the cheesecake pan over a cookie sheet and put both over the pan. This created  a steamy environment in my oven and allowed the cheesecake to cook all the way through while retaining a smooth creamy texture and most importantly with no surface cracks whatsoever.

After one hour, turn off your oven, shake the tray, make sure the middle is still wiggly and leave the oven door cracked open for another half an hour to an hour. 
Let it cool completely before you put it in the fridge overnight. 


For the caramel you need:
  • 100 g sugar (50 g white sugar, 50 g dark brown sugar)
  • 40 g cold butter
  • 150 ml cream (35%)
  • 1/4 tsp of sea salt
  • 1/2 tsp cinnamon
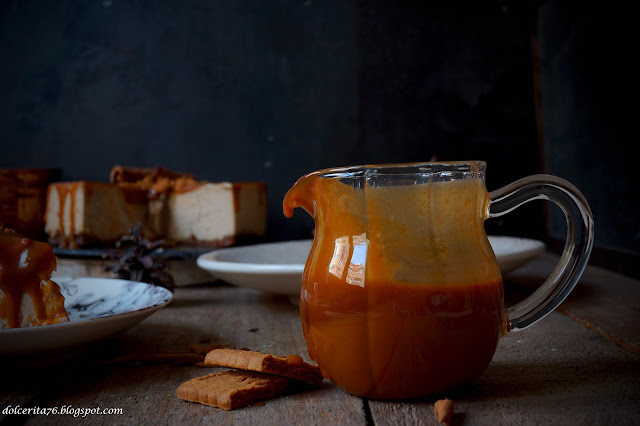
Make the caramel following the instructions in this post, and just add the cinnamon with the salt and you´re done. Before serving the cheesecake, drizzle the caramel over, and feel free to drizzle more on your piece.

If you love a creamy baked cheesecake but wish for a new flavor then this recipe is for you and for all cheesecake lovers and boy there are so many of us out there!


Wednesday, September 30, 2015

Chocolate Orange Crinckles and Crackles


After a long and hot summer, I can´t be happier with the arrival of autumn. The temperature are still rather high for this time of the year but not hot enough to prevent us for enjoying chocolate in all its baked goodness. Baking season is on again, and what better than chocolate cookies to start with?

The chocolate cookies recipe I chose will yield not only delicious but also very pretty cookies without any decoration effort. The cookie dough expands and cracks the white sugar layer creating a mosaic effect of black and white that is unique to each cookie.
These cookies have a soft and fudgy texture and can be made in no time. Kids and adults alike can enjoy them with a cup of milk or a cup of coffee.

Like always, recipes can be tweaked to suit your individual taste. The flavors I used to enhance and complement that of chocolate were orange and coffee. But you can add whatever flavor that goes well with chocolate or just enjoy the taste of pure chocolate. 


For  about 24 to 25 cookies you need
  • 110 dark chocolate, melted
  • 60 g soft butter
  • 100 g brown sugar (you can use more if you like sweeter flavors)
  • 100 g flour
  • 25 g cocoa powder (unsweetened)
  • 1 egg
  • 1/2 tsp baking powder (about 3 g)
  • dash of salt
  • 1/4 tsp instant coffee (optional)
  • the zest of one small orange (about a tsp)
  • 2 tbsp milk
  • fine sugar and powdered sugar for coating 

First sift together flour, cocoa powder, baking powder and salt then add the coffee if you are using it.

In a mixing bowl, cream the butter, sugar and orange zest. Once the mixture is creamy add the egg and whisk until combined, add the chocolate and mix again. When the mixture is homogeneous, and at the lowest speed, add half of the flour mixture mix then add the milk and finish with the second half of the flour mixture.

Refrigerate for at least 2 hours, either in the bowl, or transfer it to a small square container (about 16 x 16 cm). Once the dough is really cold, you can use a small ice cream scoop to form small balls or just use a spoon. If you left the dough in the square container, divide it into 24 small squares and roll them into balls.


First, roll the balls in the fine sugar then give it a good coating of powdered sugar. Be generous with the sugar to get a really elegant and beautiful result.

Cover a baking sheet with parchment paper and place the cookie balls on top and make sure you give them enough space to expand while baking. The recipe will be enough to fill 2 baking sheets so if you don't have 2 sheets, bake the first  batch while the remaining cookies still happily in the fridge.

Bake in a preheated oven (180C) for 12-14 min. Leave the cookies to cool for at least 5 min on the baking sheet before transferring them onto a cooling rack.

Enjoy a mouthful of melting chocolate cookies with a refreshing autumn flavor that will comfort you any time and every where.

Sunday, May 31, 2015

Lemon and Thyme Shortbread Cookies.


I like neighborhood shops, of all kinds. They are more friendly and have this extra human interaction that you just don't get in large supermarkets. Down in my building, there's a shop that saw many businesses come and go in the past few years. Last winter, I couldn't be happier to see that this place is now a flower shop. As I go to work and come back home I am greeted with various beautiful shapes and colors and not to mention the familiar and exotic scents.
I often stop by to check out the latest arrivals and last week a small plant with the cutest small purple flowers caught my attention. It was a thyme plant with a fantastic aroma; I bought it immediately.


As I got home I started thinking of the many recipes that one could make with thyme. I went with one that would also feature the fresh lemons that I got from Valencia and it is this recipe that I am sharing with you. Both lemons and thyme capture the essence of Mediterranean summers and having both ingredients in one recipe is just what I needed to cope with the hot days Madrid has been experiencing lately. There are many recipes of shortbread out there and almost all are pretty easy and straightforward. Like many basic doughs, shortbread dough is flexible enough and can absorb as many flavors as your heart desires and this is what I did with the lemons and thyme I had!


To make around 8 to 10 round shortbread cookies flavored with thyme and lemon you need:
  • 120 g white flour
  • 25 g potato flour (you can use rice flour or cornflour instead)
  • 50 g sugar
  • 100 g butter (room temperature)
  • zest of a small lemon
  • 1/2 to 1 tsp of chopped thyme leaves
  • dash of salt
Cream the butter with the sugar. When well combined, add the lemon zest, the thyme, the salt and mix again. Finally add the flour and mix well with the butter mixture. 
Wrap the dough in plastic and leave it in the fridge for at least an hour or overnight as I did.
You can shape the cookies as you like. What I did is to flatten the dough until about 1 cm thick and then used a 6 cm round cutter to cut out the dough.


After shaping you need to refrigerate the cookies for half an hour. Bake the cookies in a preheated oven (170 C) for 10 to 15 min. The baking time depends on the shape of the cookies and your oven. The rule of thumb is that you don't want to cook the shortbread for too long. You just need  the cookies to acquire a light golden color.

The cookies are delicious as they are, but if you want you can add a bit of lemon icing for an extra  touch. The icing is made by simply mixing some powdered sugar with lemon juice. You add just enough lemon juice to have the pouring consistency you like.

Decorate, serve and enjoy!


Saturday, April 18, 2015

Hazelnut Sugar Cookies with a Touch of Chocolate


I have this thing for cookies, any kind of them!. As you may have noticed I already posted many cookie recipes and will continue to do so as they are easy to make and can be adapted to suit just about any taste. 
I am also a huge fan of nuts and at any given time, there's bound to be at least 4 or 5 types of them in my kitchen. I consume them as snacks or put their wonderful taste and texture to use in sweet or even savory recipes.

A year ago, I made a hazelnut and coffee cake and it was an amazing combination. Since then I wanted to incorporate hazelnuts into another recipe and that's how this recipe came about.

These cookies have a very deep and rich nuts flavor which goes along so well with the little amount of chocolate that the recipe contains.Any serious fan of the buttery and complex flavors of nuts, especially hazelnuts, should try this recipe.

And here's how you make it.
For the cookie dough:
  • 160 g soft butter
  • 40 g hazelnut paste
  • 40 g lightly toasted ground hazelnut
  • 1 tsp vanilla paste or extract
  • 1 small egg at room temperature
  • 390 g all purpose white flour
  • 10 g cocoa powder
  • 120 g brown sugar
  • dash of salt

First, combine flour, cocoa powder, hazelnut and salt and set aside.
In a bowl and on a low speed, mix the butter, sugar and the hazelnut paste until combined. Add the egg and vanilla and mix for a couple of minutes.
Start adding the flour mixture and mix. When all the ingredients almost come together, flip the mixture over your working surface and gently mix until the dough comes together.


Wrap the dough in plastic film, flatten into  a 1 cm disk and refrigerate for at least 4 hours or overnight.

On a lightly floured surface, roll the dough to about 3 to 5 mm in thickness. Cut the shapes you want using a cutter or a sharp knife, just pay attention that if the dough becomes soft put it back in the fridge for about half an hour. The number of cookies you might get from this batch of dough depends on the size of  the cutter you use or the size of the shape you desire , but in any case you will get lots of cookies!

Place your cookies an a baking sheet covered with parchment paper, and put them it in the fridge for at least half an hour. Meanwhile, heat your oven to 180C. Put the cookies in the oven for about 10 min, till they are just cooked through but not over-cooked.

It might seem tedious to move the dough in and out of the fridge many times, but doing so is needed to ensure the cookies are flat with no bubbles and will keep their shape once baked.

This recipe works really well if you love decorating cookies and you want to try a new flavor. I decorated few of these cookies and I added hazelnut aroma to the royal icing to compliment the flavor of the cookies. You can see the result below.


I also dipped some of the cookies in melted chocolate (any kind you want) and sprinkled some chopped hazelnuts on top. Finally, I sandwiched some with my favorite chocolate spread and that is Nutella, of course!

Thursday, February 12, 2015

Sandwich Cookies with Ganache: a Delicious Treat for Valentine!


For me baking is an act of love, something that fills me with joy and does good to my soul. As with any passion, you cannot keep what you are passionate about for yourself. Sharing your passion with others helps it to be more complete, after all sharing is caring, right? 

And now that Valentine is upon us, it´s a good excuse to bake and share the passion with the world. Of course, you don't need any excuse to bake but during  special occasions, especially one like this, you get more motivation to do so, especially if you intend to share your labor of love with that significant other whomever it may be.


Few days ago I discovered caramelized white chocolate, and of course I had to give a try. So I made a small jar following the recipe of David Lebovitz!

Initially I wanted  to make cookies with rose petals and rose water with white chocolate and pistachio ganache. However, after discovering the exquisite caramelized white chocolate I decided to make two cookie batches using this wonderful chocolate spread. This might seem complicated, however, the base cookie dough is the same to which you can add whatever extra flavor you want. Additionally, this dough is perfect if you wish to decorate the cookies for that extra effect.


Enough talking and let start baking:

For the dough you need:
  • 200 g butter at room temperature
  • 100 g powdered sugar (add more sugar if you just want plain cookies with no filling)
  • 1 egg (about 50 g) room temperature
  • 400 g of flour 
  • dash of salt

First, cream the butter and the sugar for a couple of minutes until the butter feels just light and fluffy. Add the egg and beat again for a couple of minutes until well incorporated.
Mix the salt and flour and add to incorporate to the wet mix. Don't over mix the dough, you just want it to come together.
Lightly flour a working surface and divide the dough.
To one half add a generous tsp of vanilla paste or extract and about 10 to 20 g of finely chopped white caramelized chocolate (you can use plain white chocolate instead).
To the other half add a tsp of ground rose petals (I ground them in a coffee grinder), and a tsp of rose water. Alternatively you can just add rose essence, but the rose petals give extra texture and color to the dough.

Knead each half of the dough gently to incorporate all the ingredients until the dough is no longer sticky. You may need to add a sprinkle of flour!

Leave the dough on the counter for few minutes, uncovered!

Place each batch of the dough between 2 baking papers and roll out. Refrigerate for at least 4 hours or over night for best results.

Take the dough out and cut the cookies using the molds you like. I used several cutting molds including heart-shaped ones, after all it's Valentine! Refrigerate for an additional 30 min so that the cookies hold their shape while baking.

Bake the cookies in a preheated oven (180C) for 10 to 15 min. Baking time depends on the thickness and the size of the cookie! For cookies that I know I will decorate I opt for thicker base, around 6 mm is fine. For the sandwich cookies I make the base thinner, around 4 mm is perfect, and if you are feeling adventurous 3 mm.

For the caramelized white chocolate ganache you need:
  • 100 g caramelized white chocolate, chopped
  • 50 g cream (35% fat content)
  • tsp of vanilla essence or paste
On a gentle heat simmer the cream and then pour it over the caramelized white chocolate. Whisk until all the chocolate has melted then add the vanilla! The ganache is done.

For the pistachio ganache:
  • 100 g of white chocolate
  • 50 g cream
  • a tsp or 2 of pistachio paste (if you can´t find it, here is a link for a homemade recipe)
Follow the same steps described for the first ganache.


When the ganache has completely cooled you can sandwich the cookies together! Just put enough filling to cover three quarters of the base cookie, top with another cookie and press gently until the filling reaches the edges.

And if you are, like myself, a fan of cookie decoration, use your creative imagination to make something suitable for Valentine. Here's some of the cookies I decorated.

Remember, baking and cooking is an act of love. Enjoy baking, and Happy Valentine.


Wednesday, December 31, 2014

Merry Christmas and Happy New Year!


At the end of this year, and what a year it was, I just want to wish everyone a Merry Christmas and a Happy New Year.

I only wanted to use 2 colors to decorate these cookies,  white for peace and gold for wealth, maybe it would be a good omen! :)

You can check many of my sugar cookies recipes perfect to decorate!

http://dolcerita76.blogspot.com.es/2014/10/spicy-pumpkin-cookies-treat-for.html?m=1
http://dolcerita76.blogspot.com.es/2014/04/easter-chocolate-egg-cookies.html?m=1
http://dolcerita76.blogspot.com.es/2013/12/maple-and-spicy-fall-cookies.html?m=1


May 2015 bring you nothing but joy, good health, prosperity and lots and lots of good food and exquisite baking!


Tuesday, December 23, 2014

A Christmas chocolate treat from Switzerland: Brunsli


In my previous post I talked about the cookies I used to decorate the dried fruits Christmas cake. These are Swiss cookies that are usually baked during Christmas time. They are easy to make yet really delicious and perfect for this season whether you want to enjoy them with your loved ones or to wrap them in a beautiful package and gift them to friends and family.


It´s almost natural to think about Chocolate when you talk about Switzerland. It´s the land of the finest chocolate and renowned manufacturers, and it's no surprise that this wonderful product is the star ingredient of Brunsli cookies. They are also spiced with cinnamon, ginger and many other aromatic ingredients. You can use your own mix of spices that you usually use for baking and that complement the taste of chocolate.

I often bake cookies and gift them to my friends, and for Christmas I couldn't think of better than Brunsli cookies as a personalized gift! I am sure that they will appreciate this sweet gesture.


You will need the following ingredients to make many small cookies using a variety of molds. You should get around 30 pieces:
  • 100 g sugar
  • 200 g almond flour (or 100 g of hazelnut and 100 g of almond flour)
  • 25 g flour
  • 25 cocoa powder
  • 55 g egg white
  • 80 g melted chocolate
  • 15 g kirsh (sour cherry brandy) 
  • pinch of salt
  • 1 tsp cinnamon, and 1 tsp of different spices: ground star anise, cloves, nutmeg and freshly grated ginger

Combine all dry ingredients and process in a food processor until well combined. Transfer them into a big bowl.
Whip the egg white until foamy. With a spatula or using the paddle attachment combine the eggs with the dry ingredients. When well combined add the chocolate then the kirsh and mix until incorporated. 
Flatten the dough and shape it into a disk, wrap in  plastic and leave it in the fridge for at least 4 hours or over night.


When you are ready to roll the dough, sprinkle icing sugar over your working surface and roll it until it is 0.6 to 1 cm thick. Personally, I opted for a thinner dough. 
Cut the dough into the desired shapes, put the cookies over a tray covered with parchment paper and leave them to rest and dry slightly for about 15 to 20 minutes, un-refrigerated or covered. Meanwhile preheat the oven at the high temperature of 220 C (428 F), and after 20 min you can bake the cookies. Put the trays in the oven for only 2 minutes and not more as you want the cookies to be really chewy in the middle. 

These cookies are delicious on their own but if you cut them using beautiful molds you can use them as decorative elements in festive cakes like I did with the dried fruits Christmas cake. If you are into cookie decoration using royal icing, fondant and more, these cookies form a wonderful base. 


All is left for me to say now is: MERRY CHRISTMAS to everybody and may your New Year be filled with love, peace and joy!