Showing posts with label summer. Show all posts

Tuesday, June 5, 2018

Rhubarb and Strawberry Pie with Coconut Crumble Topping


As rhubarb has a short seasonal availability and it's not the easiest ingredient to find in Madrid, so whenever it's around, I incorporate it in all sort of recipes. Today's pie is an example of such recipes.
  
Strawberry and rhubarb are a beautiful flavor combination, but  add coconut to the mix and you get something really special.  It´s the first time I try this combination and it surely won´t be the last. It's such a winning combo! Trust me on that, try it and you won't be disappointed. 

This rhubarb and strawberry pie has a flaky yet crunchy crust, a sweet and soft filling with a crumbly coconut topping. Did I convince you? If so, these are the steps you need to make this lovely pie.

For the crust you need: (22 cm pan)
  • 200 g pastry flour
  • 115 g butter
  • 50 g sugar
  • 35 to 45 ml vodka or kirsch
  • dash of salt 
In the food processor, mix flour, sugar and salt, pulse for few seconds to combine, add the butter and pulse a few times to get a sandy mixture. Slowly add the vodka or kirsch; one tablespoon at first then one teaspoon at a time. Each flour has a different absorption capacity, so be careful to avoid having a soggy dough.


Once the dough forms a ball, drop the mixture on the working surface and gather it. Do not over work the dough. Wrap in plastic and let the dough rest in the fridge for at least an hour or overnight.

Once you´re ready to bake, flatten and roll the dough on a floured surface to about half a cm thick and place it in the pie dish. Prick the dough with a fork, cover with baking paper, put some weight over it (beans, rice or ceramic pearls) and blind bake for 10 to 15 min in a preheated oven (180 C). 

Set aside to cool.


For the filling:
  • 3 tbsp of raspberry and rhubarb jam (or any strawberry jam)
  • 125g sliced strawberies
  • 125g sliced rhubarb
  • 50 g sugar (or adjust to your liking)
  • 1 tbsp corn flour
  • seeds of half a vanilla bean 
  • 1/2 tsp orange zest
  • pinch of salt
Mix all ingredients but the jam and leave to macerate for at least 20 minutes. 


For the streusel topping:
  • 25 g cold butter cut into small cubes
  • 25 g sugar
  • 50 g pastry or all purpose flour
  • dash of salt
  • 1 teaspoon vanilla extract
  • 50 g desiccated coconut                                                                                                                  
Combine the sugar, flour, salt and butter using a dough blender or your fingertips. Work quickly as you don´t want to melt the butter. Once you have a sandy mixture add the coconut flakes and vanilla and mix to combine.


Assembly:

Spread the jam over the baked and cooled dough. Add the strawberry and rhubarb mixture (discard the excess liquid) then evenly sprinkle the streusel on top. You can add some extra shaved coconut if you wish.

Bake in a preheated oven (180 C) until the top is golden brown. Leave to cool for at least 20 minutes before serving.

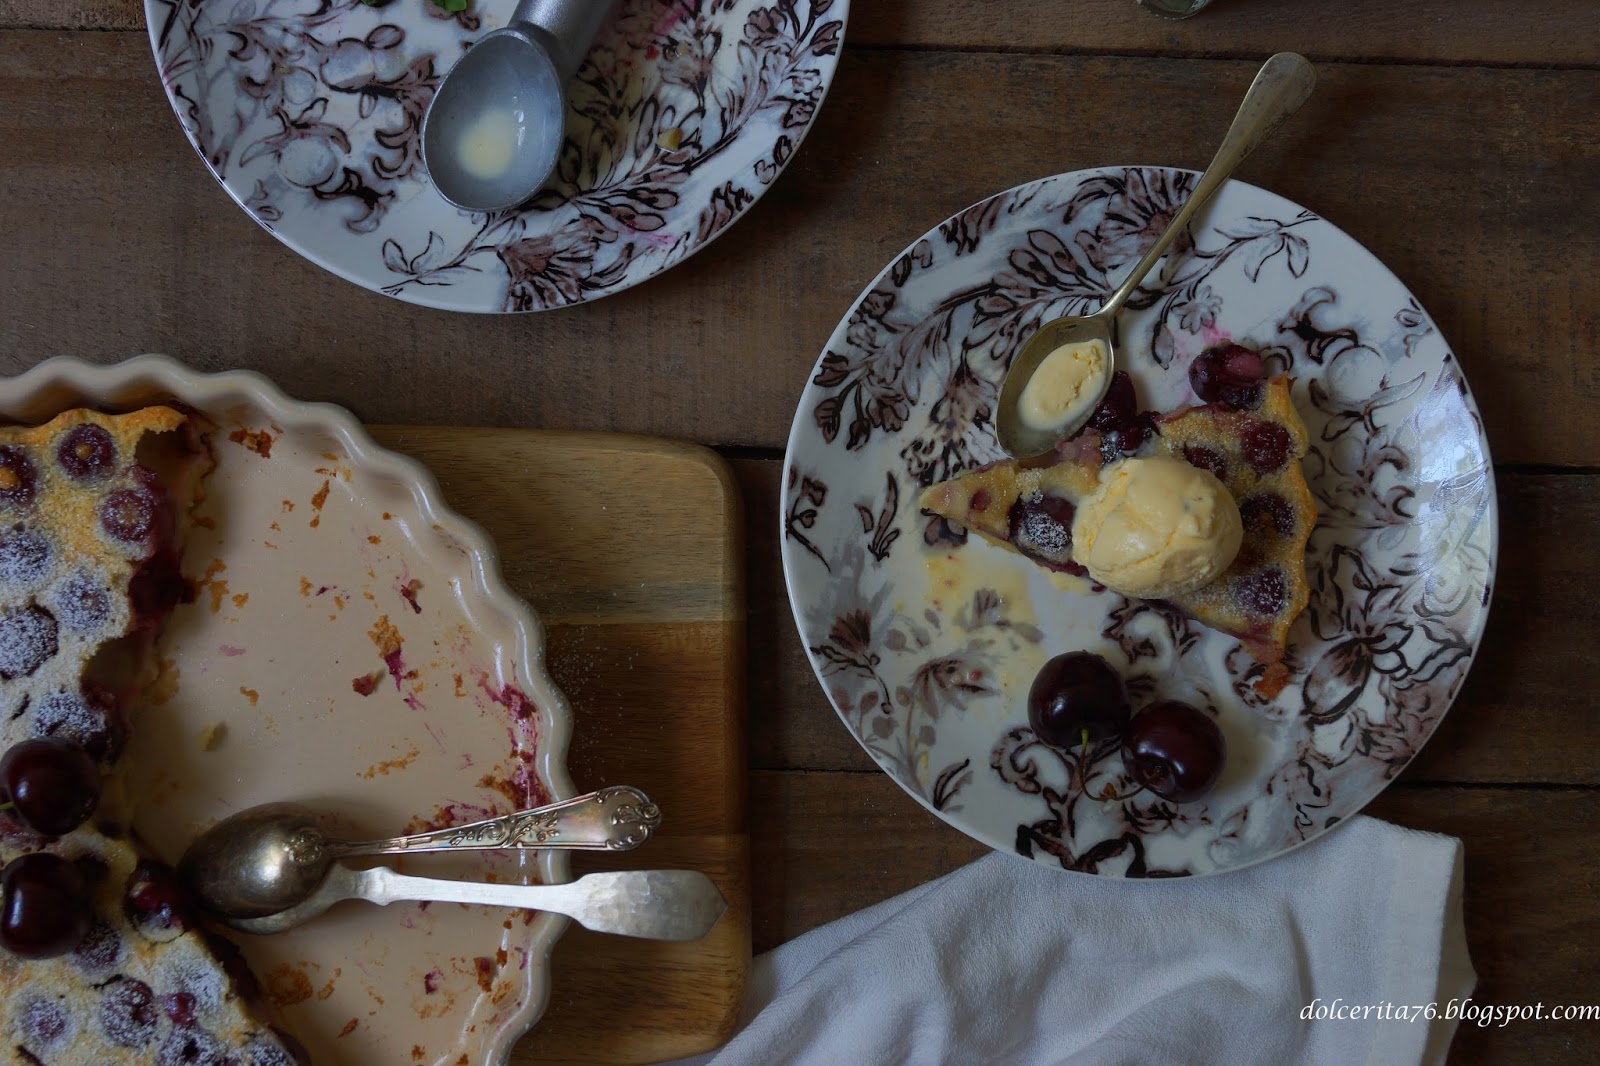
Sprinkle some powdered sugar for an extra nice touch, although not necessary. Serve while still  warm with vanilla ice cream or creme fraiche, some jam and slices of fresh strawberries. 

The combination of these flavors is spot on and will satisfy any pie lover.

Thursday, June 15, 2017

Roasted Rhubarb Sorbet


I guess it's a sign of the changes to come, but summers are starting earlier and winters are becoming milder. Climate change debate aside, it has been warmer than usual for the past month here in Madrid.

When it becomes hot, I like to hide indoors whenever possible and indulge in all sorts of cooling foods and drinks. Beer, smoothies, salads, cold soups, ice cream, popsicles, and sorbet are all my go to food and drinks to keep me refreshed.

The star ingredient of this post is not something you find easily here in Spain. You have to fish for it in specialty grocery stores.  This year I was lucky to find a shop not too far from my place that sells rhubarb and I try as much as possible to buy these lovely burgundy stalks.


I bought quite a lot of rhubarb recently with the hope of using them in at least three recipes: jam, galette and a deliciously refreshing sorbet.

The sorbet comes in time to help me ward off the heat. What's more, it takes just a few ingredients to get a light dessert that is gluten and dairy free!

Ready to make some rhubarb sorbet? Let's go. You need:
  • 250 g of rhubarb, cut into 2 cm long pieces
  • half a vanilla pod 
  • a strip of orange peel
  • 1 tbsp brown sugar 
  • 1 tbsp maple syrup (optional)
Combine all the ingredients in a pan and roast the rhubarb until soft and juicy in a preheated oven (180). It will take about 20 minutes, give or take.
Set aside to cool


While the rhubarb is cooling prepare the syrup
  • 150 g water
  • 125 gr sugar
  • squeeze of half lime
  • tbsp of kirsh, vodka or rum (optional, for a softer sorbet)
In a sauce pan combine all the ingredients, and on a gentle heat cook the syrup until it thickens a bit or until it reaches 105C.

Combine the rhubarb and the syrup and process until you get a silky smooth purée.

If you have an ice cream maker, just follow the manufacturer's instructions to make the sorbet. If not you have 2 main options:

  1. Pour the rhubarb purée in a shallow dish and put in the freezer. With a fork, scrap the mixture every hour or so to prevent crystallization.  
  2. Let the rhubarb purée freeze. Once frozen, transfer the mixture into a blender and blitz until smooth.

Now just scoop and enjoy as it is or use it to make a refreshing rhubarb mimosa to enjoy with friends or by yourself!

Monday, August 22, 2016

Tigernut Strawberry Milkshake!


Super foods are little wonders of nature that we should consume as often as we can. Some are quite common and known to everyone while others still wait their moment of glory. By now everyone is familiar with the benefits of quinoa, kale, and hemp among many others. However, I don't know how many have already heard about the benefits of tigernuts or had the chance to try them. Recently, however, tigernuts are receiving more the exposure they deserve.

Tigernuts are not a modern-day invention; in fact they have been around for thousands of years. Their name is a bit misleading as they are not nuts but small plant roots or tubers. They are nutrient rich, packed with resistant starch and vitamins like C and E.

Luckily for me, Spain is one of the main producers of tigernuts, locally known as Chufa.
Horchata, which is the name of the milk or fruit juice extracted from tigernuts, is seen everywhere when Spain's hot summer settles in. 


I don´t know why but this drink is linked with summer. Though you can find it all year long, it's really popular in this season, perhaps because it's so refreshing, delicious and nutritious.  

Horchata can be simply made at home if you have tigernuts. You just need to use 250 g of tigernuts that have been soaked overnight to which you add 1 liter of water. Process in a blender and pass the mixture through a sieve. Refrigerate and serve cold. You can add sugar if you want but I find tigernuts to be naturally sweet and do not need any extra sweetness. 

Horchata is delicious as it is, but you can always spice things up with delectable and refreshing flavors. This time I decided to flavor the horchata with strawberries and cinnamon. The drink was not only delicious, but also extremely refreshing. What's more, the drink is nutritious and helps you recover during those hot summer days!


I hope by now you are tempted enough to try this refreshing drink. If so, here are the ingredients you need to prepare enough for two:  
  • 250 ml tigernut milk
  • 100 g strawberry purée
  • 1 tsp of ground cinnamon
  • 10 ice cubes
In a shaker, combine all ingredients, and shake for about a minute, pour into a glass, sprinkle some cinnamon and serve immediately! If you don't have a shaker use a jar, then strain the mixture!

Enjoy!

Sunday, August 30, 2015

Mascarpone and Berry Popsicles


This has been probably the hottest summer ever! August is almost over and I feel this summer just won't end. Don't get me wrong, I love summer and all the things it brings but the scorching heat is not one of them.

I have been dealing with the heat waves with light food, lemonade and popsicles, of course.
These frozen delights are easy to make. One can get really creative and never get bored as there are so many flavors that you can choose from. I shared with you before several popsicle recipes: pink lemonadebellini or blueberry lemon and lavender. It's time for a new one!


This frozen delight features a rich mascarpone cream combined with a vibrant and tangy mix of red summer berries and fruits. The combination is wonderful, but truth be told it is not as light as the other recipes I made, however, it's really worth the extra calories.


To make 8 popsicles (70 ml approximately each) you need:
  • 250 g mascarpone
  • simple syrup (recipe follows)
  • 250 mixed berries and fruits, fresh or frozen (use your favorites)
  • 30 to 50 g sugar
  • 1 tbsp lemon juice
  • half vanilla pod or 1 tsp vanilla extract
Simple syrup:
  • 100 ml water
  • 75 g sugar
  • 1/2 tsp lemon juice

First start making the syrup by combining the sugar and water. Mix a bit to dissolve the sugar, then bring it to a simmer on a gentle heat for about 5 minutes. When you start seeing bubbles on the surface add the lemon juice let it simmer for one minute, turn off the heat and let it cool.

While the syrup is cooling, combine the fruits with the sugar, lemon juice and vanilla and bring to a gentle simmer. The fruits will be ready when they are shiny and a bit soft. Turn off the heat and let the mixture cool down.

When everything is at room temperature, mix the simple syrup with the cheese, start filling the molds with both mixtures alternating between the cheese and the fruits. Now you're ready to pop the molds into the freezer for at least 6 hours or overnight.

Enjoy this colorful and full of flavor summer treat while you still can! 

Friday, July 31, 2015

A Jazzed Up Cherry Compote!


In my last post I have mentioned that I will be posting some recipes featuring cherries as a main ingredient. As the season of these amazing summer fruits is coming to an end, there are many ways to preserve them while at their peak of freshness and quality.  You can of course make jam out of cherries and it will taste wonderful but this time I thought of preserving them as compote. This option is slightly different from jam as you won't need to chop or process the cherries, however, you may pit the fruits or leave them whole.


Cherry jam made only with cherries has a wonderful taste on its own but I do find it needs a booster and what better way than to add some citrus fresh for added freshness and taste? I do believe that lemon, lime and orange (or any citrus for that matter)  add so much flavor to both sweet and savory recipes even when used sparingly.

This compote recipe is really quite simple but perhaps the only problem with it is the cherry pitting. It does take time and you better wear gloves if you don't want your hands to stain! However, the end result is really worth it! I have made several batches of this compote, and I think I will keep on making it until the cherry season is over. It is really that good!


For 2 small jars or a big one,  you will need:
  • 350 g pitted cherries
  • 180 sugar
  • 1 lemon and 2 orange peels (a small slice of each fruit is enough, remember you only need the zest)
  • 1/4 tsp of pectine (optional, it thickens and helps in the setting of the compote)
  •  1 tsp lemon juice and 2 tsp orange juice
Combine everything in a heavy bottom sauce pan, mix well then leave to simmer over a gentle heat for about 30 min. When done, the cherries are tender but still holding their shape. If you overcook them, the fruits will disintegrate and you don't want that in a compote.
Transfer to sterilized jars and close. Once cooled transfer to the fridge. If you want to preserve them out of the fridge, you need to sterilize the filled jars again. However, once opened, it's better to put them in the fridge. I usually don't bother with this process as I only make small batches.


Enjoy them over your pancakes, over a toast and some butter, as a filling for a cake, over baked brie or camembert, really, the choices are endless.


I will share with you soon an easy recipe using this extremely delicious compote, stay tuned!

Sunday, July 19, 2015

Cherry Clafoutis, a summer classic.

Summer is an amazing season and although I´m not a fan of hot weather, however there are so many beautiful things to do and to enjoy during this season that make up for this annoying detail.

Any visit to the market during summer-time will greet you with a bounty of wonderful fresh fruits; a feast for the senses! As the season progresses different fruits and fruit varieties start to make their way to the market. By late spring and well into summer, fresh cherries can be easily found in Madrid markets. Cherries not only look good and taste great but they are also highly nutritious. With so many cherry varieties from sweet to sour, there's a cherry variety to just about any taste. 

I love all fruits, well almost, but cherries are one of my favorites and hold a special place in my heart. When I was still a kid, I used to pick them fresh from my uncle's orchard which was teeming with cherries, apricots and apples. Anyone who tasted super fresh fruits picked from trees knows that it is quite unrivaled, and until this day I don´t think I have tasted something as delicious as those cherries.

Nevertheless, the Jerte Valley of Spain is very popular for its cherries that are well appreciated and can be found in almost all markets. To make good use of this super fruit in its season and peak of freshness I decided to use it in several recipes starting with a classic: the cherry clafoutis.


Like many great classics, cherry clafoutis is a French dessert that is surprisingly easy to make and can be simply tweaked to meet your taste. The recipe has two main parts, the base and the fruit. The base is very simple and pretty similar to the crêpe batter. Once prepared it is poured over the fruits and the whole thing baked in the oven.

I should note that traditionally the recipe keeps the cherries whole, but I like them pitted. It's really up to you to pit the cherries or not. In case you don't want to pit them, do warn your guests!


For a 22 cm tart pan you need:
  • 2 large eggs
  • 70 g sugar
  • 30 g melted butter
  • 30 g ground almonds
  • 75 g flour
  • 125 ml milk plus 125 ml of cream
  • 350 g  pitted cherries
  • 1 tsp of kirch (optional) and a 1/2 tsp of vanilla extract or 1 tsp vanilla sugar
  • dash of salt

First whisk the eggs with the sugar, the kirsh and the vanilla then add the melted butter and whisk again. Fold in the almonds, the flour and the salt. Slowly add the milk and cream while mixing to avoid having  any lumps.
Once you have a smooth batter you just need to pour it over the cherries that you have arranged in the generously buttered tart pan.


Bake for about 10 min at 200C then lower the temperature to 180C and bake for an additional 15 to 20 min.
You need to watch the clafoutis and take it out of the oven when it´s golden brown and still a bit soft in the middle. 

Serve it warm with some vanilla ice cream and a light dusting of powdered sugar. It´s also delicious when it´s cold, but I like to heat for 10 sec in the microwave before enjoying the leftovers!

Enjoy this wonderful classic dessert with its authentic and refreshing taste of summer!

Thursday, July 9, 2015

Watermelon and Salmon in a Refreshing Summer Salad.


I have been living in Spain for over a decade now, and I can truly understand why it is one of the world's top touristic destinations. The weather, the amazing nature, the rich history, the beautiful cities, the breathtaking beaches and of course the world class cuisine draw people form across the globe to try to the Spanish way of life.

If you had the chance to visit Spain so you must be familiar with tapas. A tapa is a small food portion that can range from just some olives to sophisticated meals and salads. In many places tapas are served for free with a drink, you can also find restaurants were only tapas are served.

Last year, in a hot summer day like the ones we're having this year, and in one of my favorite restaurants in the center of Madrid I tried a deliciously refreshing salad. It had a weird combination of ingredients but it was extremely delicious and perfect for hot summer days which often get too hot in Madrid.

I remembered this salad recently as  the Foodies plus, a Google plus community, suggested a Spanish Tapas month. I thought this salad would be the perfect recipe, since it could be served as tapas, as a first course or even a light main course. In all cases, this salad will surely please those who like to venture and try new flavor combinations; however, anyone should try it as it's easy to make and delicious.


For 4 persons, you need:
  • 150 g watermelon cut into cubes
  • 100 g smoked salmon, cut into small strips
  • 1 avocado cut into cubes
  • 1 tsp mustard
  • the juice of one big lemon or 2 small ones
  • salt and pepper to taste
  • 1 tsp chopped dill
  • black salt (optional) for decoration and olive oil
You just need to mix everything in a bowl, then arrange a small portion in a plate, add few drops of olive oil, decorate to your liking and enjoy with a cold beer or chilled white wine!

Sunday, May 31, 2015

Lemon and Thyme Shortbread Cookies.


I like neighborhood shops, of all kinds. They are more friendly and have this extra human interaction that you just don't get in large supermarkets. Down in my building, there's a shop that saw many businesses come and go in the past few years. Last winter, I couldn't be happier to see that this place is now a flower shop. As I go to work and come back home I am greeted with various beautiful shapes and colors and not to mention the familiar and exotic scents.
I often stop by to check out the latest arrivals and last week a small plant with the cutest small purple flowers caught my attention. It was a thyme plant with a fantastic aroma; I bought it immediately.


As I got home I started thinking of the many recipes that one could make with thyme. I went with one that would also feature the fresh lemons that I got from Valencia and it is this recipe that I am sharing with you. Both lemons and thyme capture the essence of Mediterranean summers and having both ingredients in one recipe is just what I needed to cope with the hot days Madrid has been experiencing lately. There are many recipes of shortbread out there and almost all are pretty easy and straightforward. Like many basic doughs, shortbread dough is flexible enough and can absorb as many flavors as your heart desires and this is what I did with the lemons and thyme I had!


To make around 8 to 10 round shortbread cookies flavored with thyme and lemon you need:
  • 120 g white flour
  • 25 g potato flour (you can use rice flour or cornflour instead)
  • 50 g sugar
  • 100 g butter (room temperature)
  • zest of a small lemon
  • 1/2 to 1 tsp of chopped thyme leaves
  • dash of salt
Cream the butter with the sugar. When well combined, add the lemon zest, the thyme, the salt and mix again. Finally add the flour and mix well with the butter mixture. 
Wrap the dough in plastic and leave it in the fridge for at least an hour or overnight as I did.
You can shape the cookies as you like. What I did is to flatten the dough until about 1 cm thick and then used a 6 cm round cutter to cut out the dough.


After shaping you need to refrigerate the cookies for half an hour. Bake the cookies in a preheated oven (170 C) for 10 to 15 min. The baking time depends on the shape of the cookies and your oven. The rule of thumb is that you don't want to cook the shortbread for too long. You just need  the cookies to acquire a light golden color.

The cookies are delicious as they are, but if you want you can add a bit of lemon icing for an extra  touch. The icing is made by simply mixing some powdered sugar with lemon juice. You add just enough lemon juice to have the pouring consistency you like.

Decorate, serve and enjoy!


Tuesday, September 16, 2014

Deep Scarlet Red Summer Popsicles

As summer nears its end, its great to indulge in the special moments it gives us. What better way to celebrate vibrant summer flavors than to enjoy delicious deep red sweet and tart popsicles?

Like many of  you, I consider popsicles as the best companion for hot summer days. Forget about those commercial popsicles loaded with artificial flavors, colorings and are way too sugary; popsicles are easy to make at home and you control what goes in. The end result will definitely please you.

The popsicles featured in this recipe combine the robust, fruity, refreshing and fragrant flavors of lemon, blueberries and lavender.

To make 8 popsicles (70 ml approximately each) you need:
  • 300 g blueberries
  • 1 tbsp of sugar
  • 250 ml lemon juice
  • Simple syrup (recipe follows)

First put the blueberries in a pan with one tablespoon of sugar and leave it to heat over a low flame. When the berries ooze out their juice, remove them from the heat and set aside to cool. Using a hand-held blender (or a regular one) I mixed the blueberries until smooth. You can pass the mix through a sieve to remove the seeds and the peel if you are picky, but honestly I didn't bother as I like the added texture they give. 


For the syrup you need:
  • 100 ml water
  • 130 g sugar
  • 1 tsp lavender
  • 1 small slice of lemon peel and a squeeze of lemon juice

First heat the water, add the lavender and leave it to steep. Now combine the sugar with water, add the lemon peel and let it simmer on a low heat. When the syrup bubbles vigorously  add a squeeze of lemon juice and turn off the heat. Leave to cool a bit.


Now that you have all the ingredients ready, you just need to combine them and mix.

Pour the liquid in the popsicles molds and put in the freezer to set for not less than 4 hours.

Savor these delicious ice pops on a warm summer night, close your eyes and enjoy the explosion of summer flavors.